Creating a Route Sheet
A route sheet helps inspectors organize inspections and displays inspection routes on the map, enabling inspectors to minimize the time and distance that they travel. Inspectors can view their scheduled inspections, order them according to their preference, add a stop to their route, and then view their route on the map.
Topics:
Creating a Route Sheet from the Inspection Route Sheet Page
- Navigate to the Inspection Route Sheet page from the Launchpad.
Creating a Route Sheet from the Inspection Page
- Navigate to the Inspections page from the Launchpad. Civic Platform displays a list of inspections.
- Click Route Sheet. Civic Platform displays the Inspection
Route Sheet page.
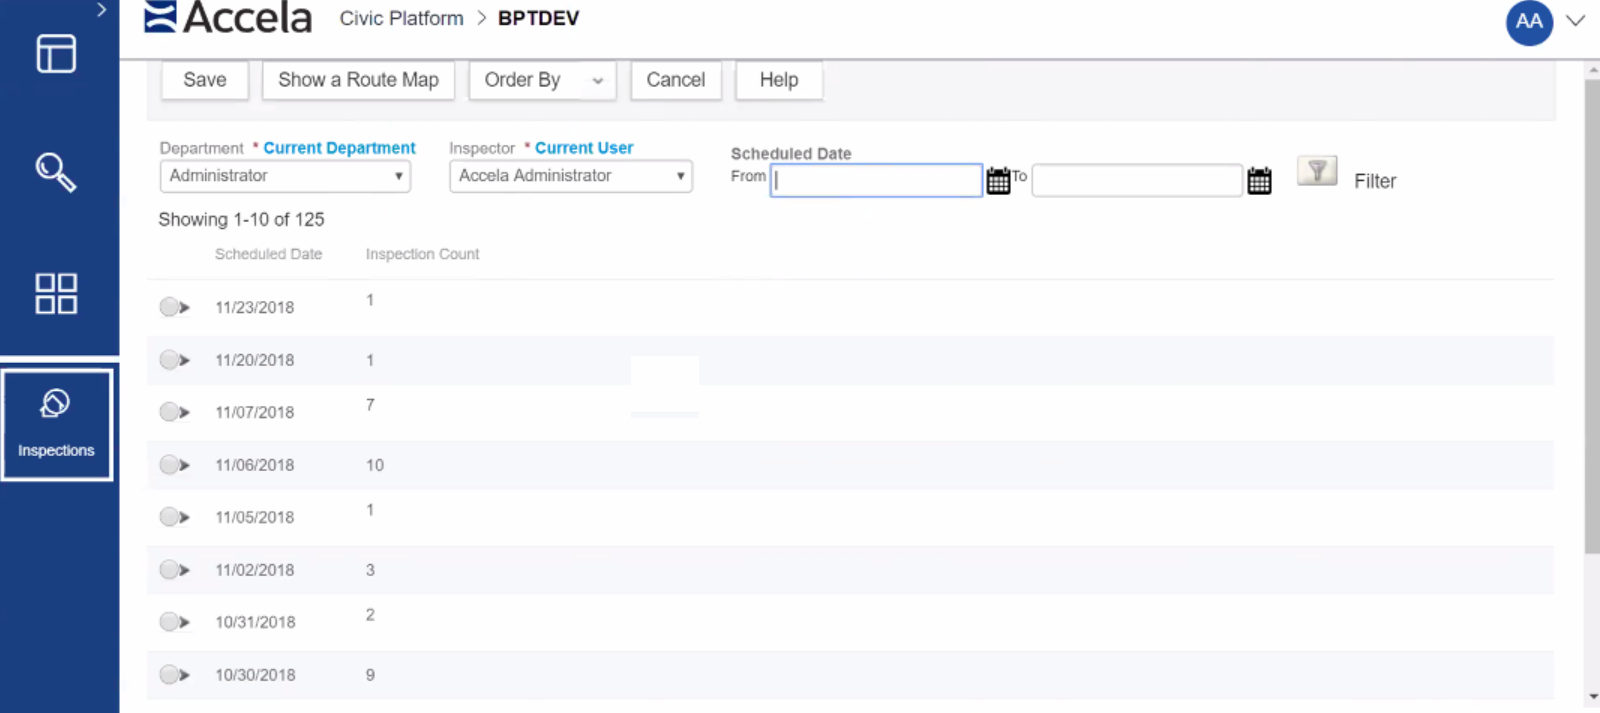
- Select the relevant department from the Department drop-down list. Civic Platform populates the Inspector drop-down list based on the department selection.
- Select an inspector from the Inspector drop-down list. Click Current User to populate the field with your user name.
- Define the date range for the scheduled inspections in the From and To fields.
- Click Filter. Civic Platform filters the inspection list.
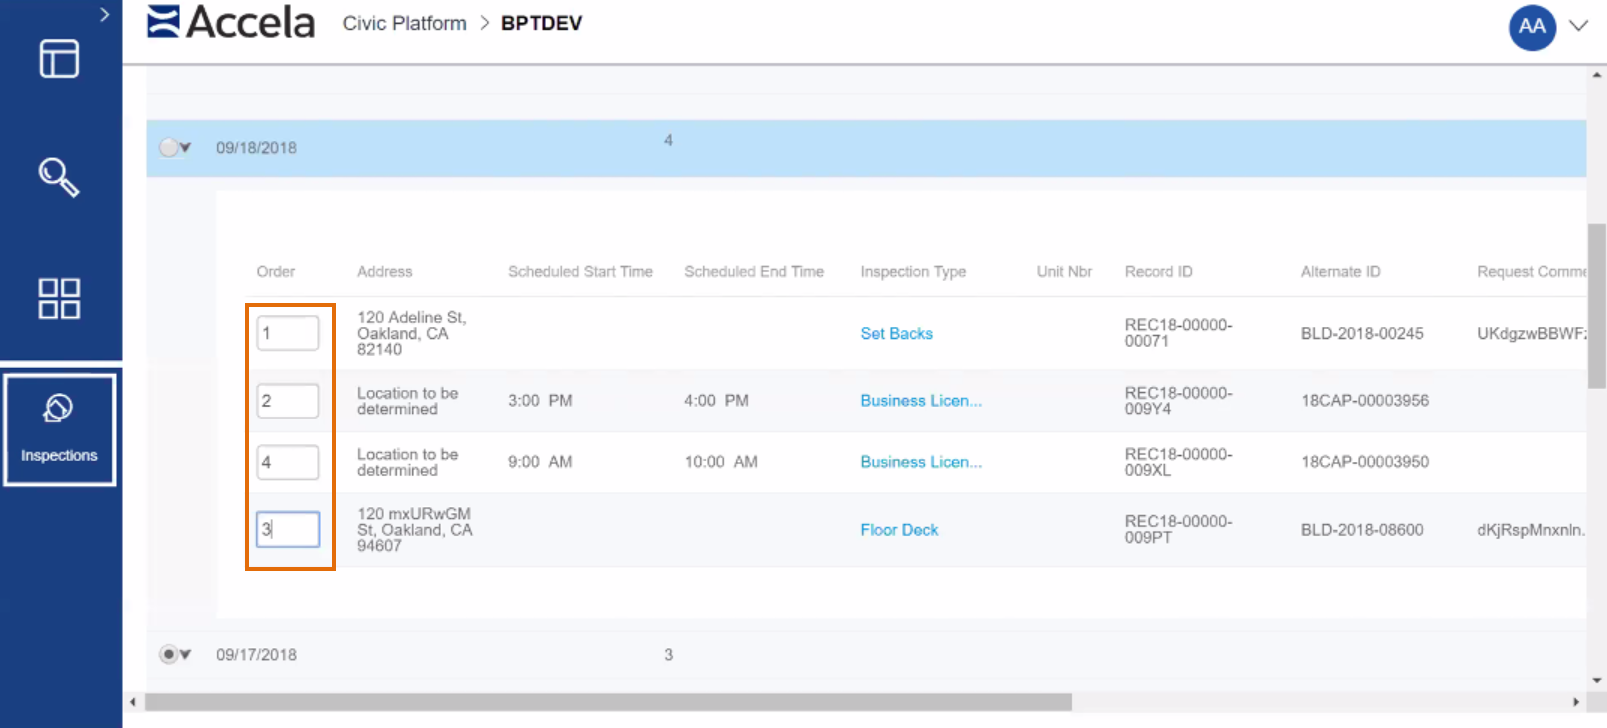
- Select the date for which you want to route inspections. Civic Platform displays
the list of scheduled inspections.

- Enter a value in the Order field to choose a preferred
order for the inspections, or simply accept the default order.
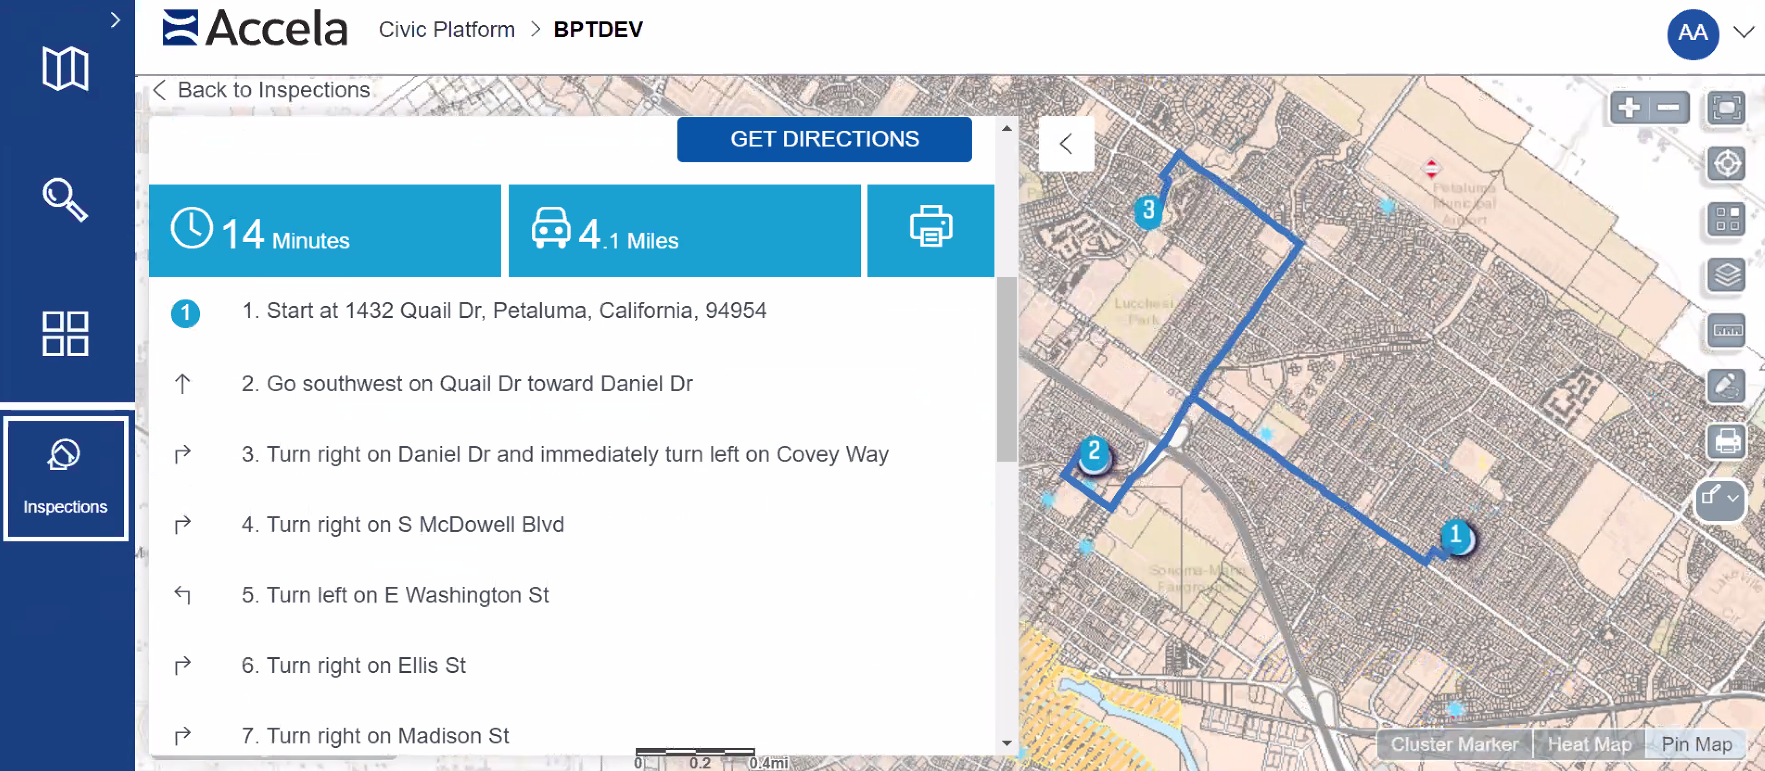
- Click Show a Route Map.
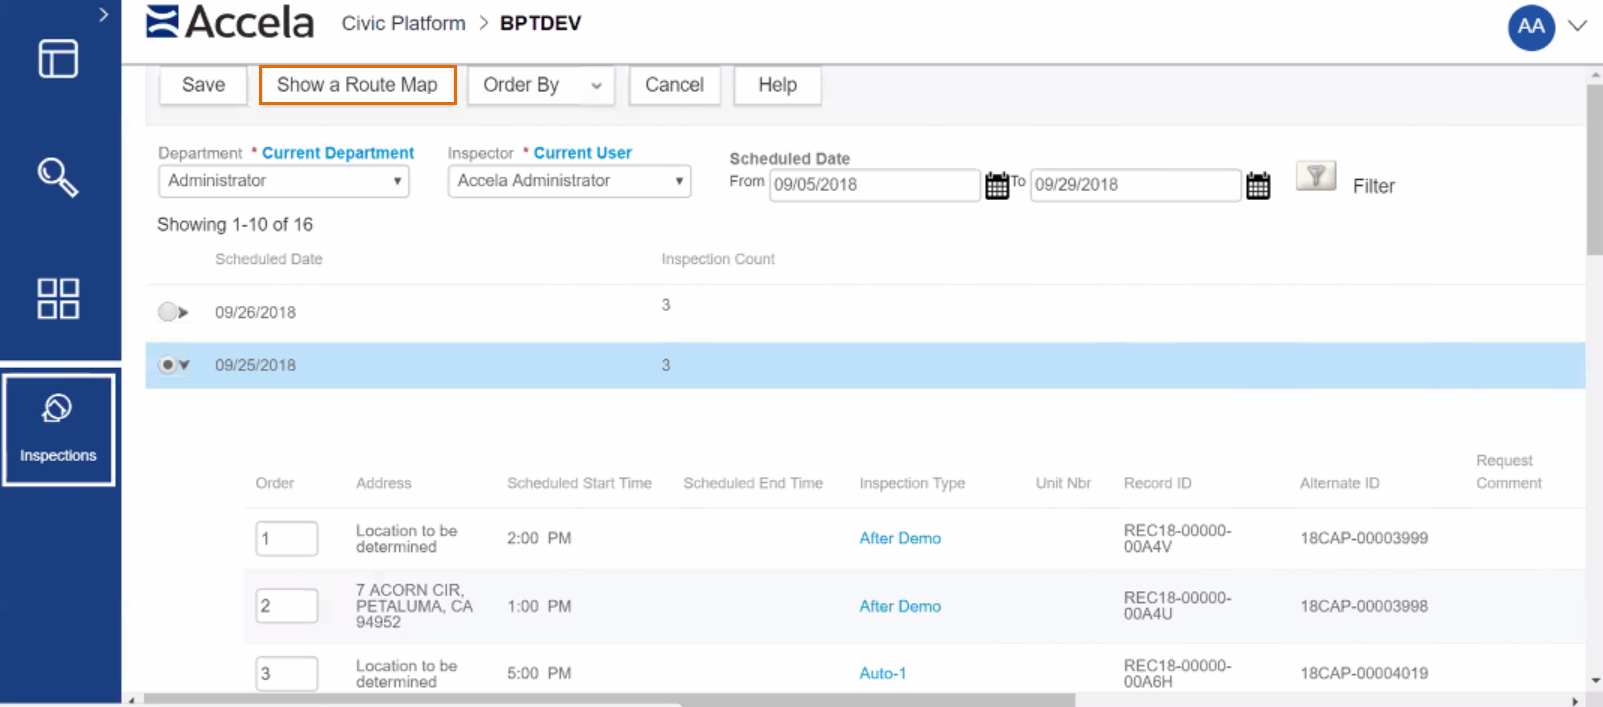
Accela GIS shows the route sheet with the selected inspections and the points plotted on the map.
Creating a Route Sheet from the Inspection Search Results
-
Search for the desired inspection(s) on the Maps Dashboard.
OR
Plot the inspections on the map from the Inspections page.
- Select the inspections to add to the route sheet from the search results.
- Click .
Accela GIS shows the route sheet with the selected inspections and the points plotted on the map.
Editing the Route Sheet
These Accela GIS functions are available from the route sheet:
- Click Add Stop to add a stop to the inspection route.
- Click the Up and Down arrows to re-order the inspection route.
- Click the Delete icon to remove a stop on the inspection route.
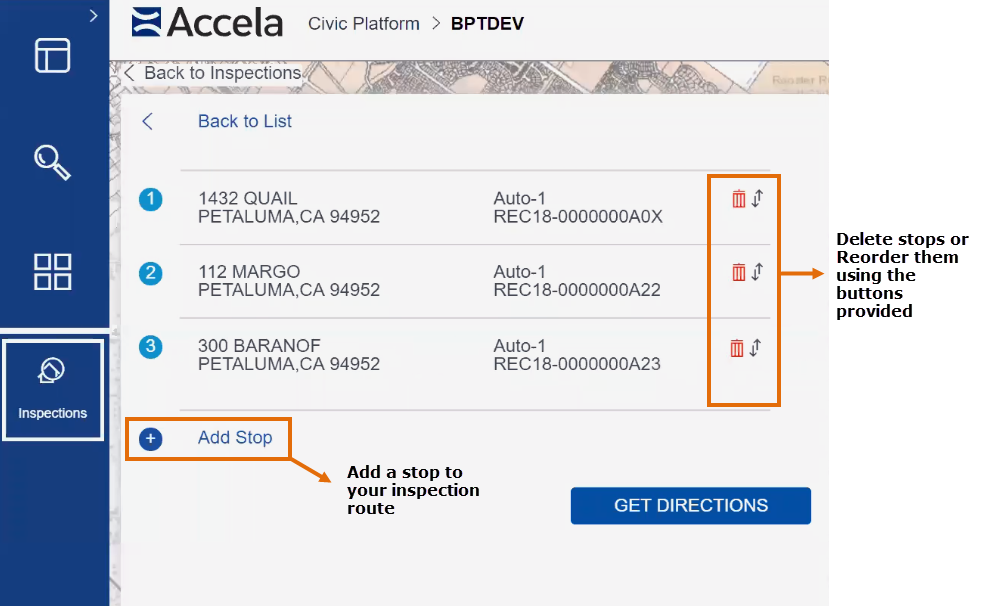
Getting Directions from the Route Sheet
When satisfied with the changes and ready to view the inspection route, click Get Directions. Any changes made before clicking Get Directions are then updated in the database. Scroll down to view turn-by-turn directions.
Plotting Inspections
| Map symbol | Description |
|---|---|
 |
The default status when an inspection has just been created and scheduled. The Records panel shows the inspection status as "Scheduled". |
 |
The assigned inspection status whose inspection result type is
Approved. The Records panel shows the inspection result status that is mapped to the Approved inspection result type. |
 |
The assigned inspection status whose inspection result type is
Denied. The Records panel shows the inspection result status that is mapped to the Denied inspection result type. |
 |
The assigned inspection status whose inspection result type is
Pending. The Records panel shows the inspection result status that is mapped to the Pending inspection result type. |
- Approved
- Denied
- Pending
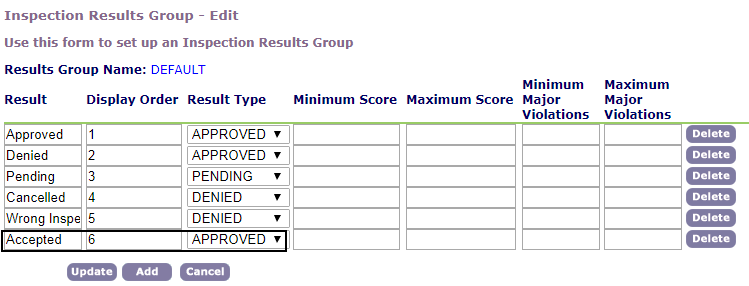
When you plot resulted inspections, the Search Results tab shows the
inspection result status that is mapped to the inspection result type. In the sample
diagram above, the sample inspection Other Encroachment - 7595813
shows an Accepted status. This sample inspection belongs to an
inspection type whose inspection result group has been configured with the following
sample list of inspection result statuses:
- If the inspection has an x-coordinate and y-coordinate value, these values are displayed. If the inspection does not have an x-coordinate and y-coordinate value, the inspection address is plotted on the map (using the inspection map symbols).
- If the inspection does not have x-coordinate and y-coordinate nor address at the inspection level, the record x-coordinate and y-coordinate values are displayed on the map. If the inspection does not have x-coordinate and y-coordinate nor address at the inspection level nor the record x-coordinate and y-coordinate, the record address is plotted on the map.
- If the inspection has associated GIS objects (such as parcels via the record), the GIS objects are also plotted on the map, in addition to the inspection marker.