Configuring Account Settings
The account settings area is where you configure:
Account details that define the accounts from which agency users send outgoing emails and SMS text messages.
Display names that become available for agency users to choose in the “from” value of all system-generated communications. A subset of the display names becomes available in the “from” values of manually initiated emails, according to the user’s permission level.
The option to retrieve all emails for the account from the Microsoft Exchange Server. For example, you might have a general, department-level email account for which you want to enable the retrieval and storage of all of the communications from and to the account in the Civic Platform database.
First implement Communication Manager by Configuring General Settings, then configure the following Account Settings:
Email Account Settings
Use the procedure below to set up each account that you want to make available for agency users to use for communicating with the public, and for retrieving emails to attach to records.
To configure email account settings
- Go to .
- Click New.
Civic Platform displays the account settings window.
- Click the Account Detail tab.
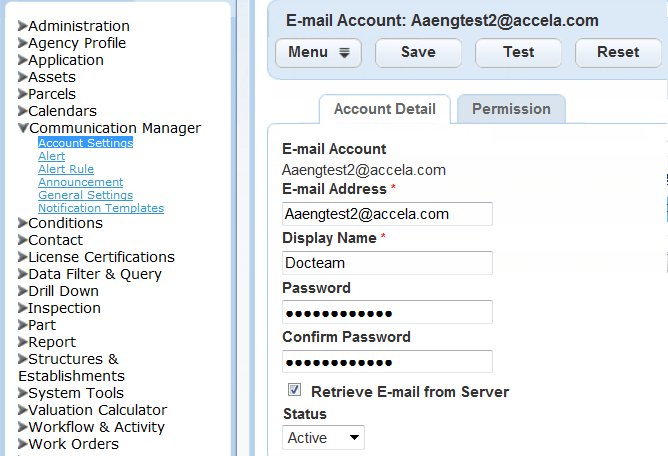
- Complete the following fields:
Email Account Enter the user name of the email account. This user name must be a valid user name of the Microsoft Exchange server that you specify in Configuring General Settings. Email Address Enter the email address for the email account you specified in the previous field. Display Name Enter a display name for this account. This display name populates in the “from” values of notification templates, manual email messages, and manual text messages. Agency users can specify the display name for their department, which then displays as the sender of the email. Password Enter the password of the email account. Confirm Password Re-enter the password. Retrieve Email from Server Check this option to copy all emails sent from and to this email address to the Civic Platform database. When you select this option, the contents of this email account become accessible in the communication manager portlet’s consolidated list of communications, organized by Inbox, Outbox, Sent Items, and Deleted Items. - Click Test to ensure the information you provided successfully connects Civic Platform to your Microsoft Exchange Server.
- If you receive a message indicating that Civic Platform failed to connect to your Exchange Server, revise your entries and test again until you receive a success message.
- Click Submit if you are creating a new account; Click Save if you are modifying an existing account.
- Click the Permissions tab.
Civic Platform displays the Permissions window.
- Click the Assign buttons to select an appropriate permission level for this account.

These permissions define which users have the ability to send manual emails from this account via a record’s Communications tab (see Viewing Records-related Communications for more information). When you grant a user permission, the user's name displays as the “from” value for sending manual communications.
Refer to Setting Up Security Policies for information about assigning permissions.
- Click Submit.
SMS Account Settings
Use the procedure below to configure outgoing SMS text messaging accounts.
SMS (Short Message Service) is a communications protocol for sending short text messages from computers to cellular devices. You must have an active, fully configured account with an SMS service provider before setting up SMS account settings in Civic Platform.
To configure SMS account settings
- Go to .
Civic Platform displays the account settings window.
- Click SMS Account.
- Click New.
Civic Platform displays the SMS Accounts window.
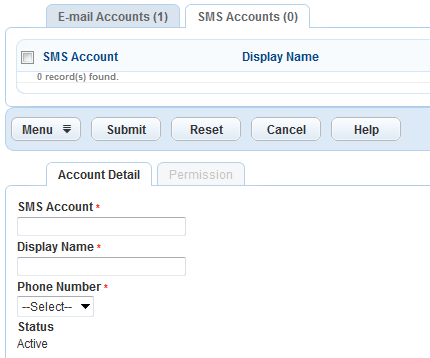
- On the Account Detail tab, complete these fields:
SMS Account Enter the user name of the SMS account. Display Name Enter the name you want to display with the account when selecting “from” values for notification templates and communications manually initiated from the Communications tab of a record. Different departments at an agency can each have their own text message accounts. Users can select the appropriate “from” values for text messages sent from their department when you configure the text message account settings here. Phone Number Select the phone number for the SMS account. The SMS adapter defines the phone numbers available to choose from in this field. This field retrieves available options from the SMS adapter web service. This number is the sender number that displays to recipients of SMS messages.
Status Active/Inactive - On the Permission tab, click the Assign buttons to select an appropriate permission level for
this account.
These permissions define which users have the ability to send manual text messages from this account via a record’s Communications tab. When you grant a user permission, the user's name displays as a “from” value for sending manual communications.
Refer to Setting Up Security Policies for information about assigning permissions.
- Click Submit.