Creating and Editing Map Features
Topics:
Adding a GIS Object
To add a GIS object to a map layer:
- Start a layer edit session:
- Click
 to open the Layers widget.
 - Expand the layer to edit.
-
Click
 next to the map layer to edit. Note: If you do not see the pencil icon, you do not have edit permissions on the layer. If the pencil icon is disabled, zoom into a visible scale.
- Click
- Click
 on the
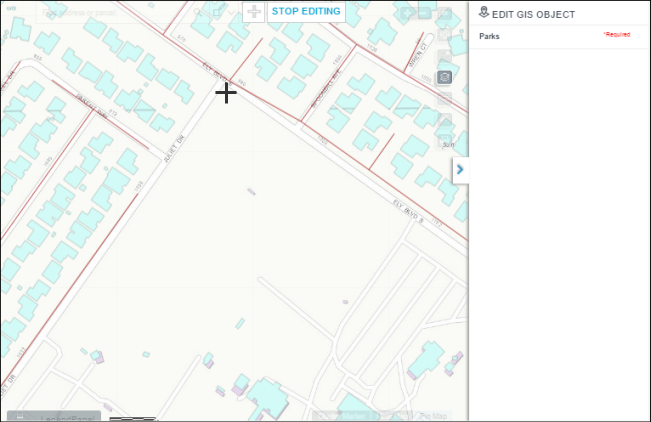
Edit Layer toolbar. The cursor displays as the + symbol and becomes a
"sticky" cursor.
on the
Edit Layer toolbar. The cursor displays as the + symbol and becomes a
"sticky" cursor. -
To start drawing, click the + cursor at the first point of the GIS object on the map.
-
Click the + sticky cursor at each subsequent vertex of a polygon or polyline.

-
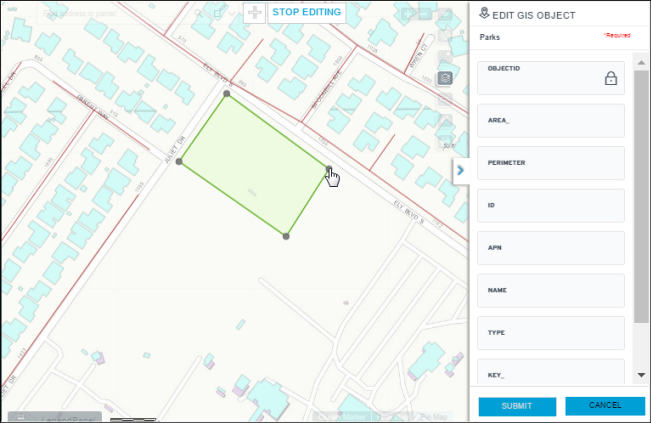
To end the drawing, double-click at the last vertex.
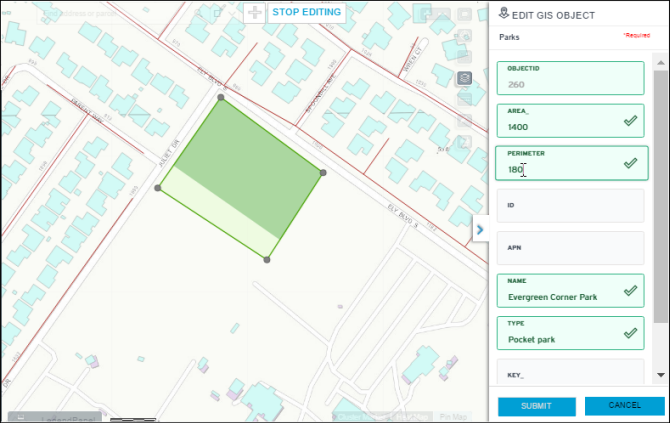
The new GIS object is highlighted, and the Edit GIS Object panel displays the GIS object attributes.
-
On the Edit GIS Object panel, enter the GIS object attribute values. The required fields are indicated with a red asterisk.
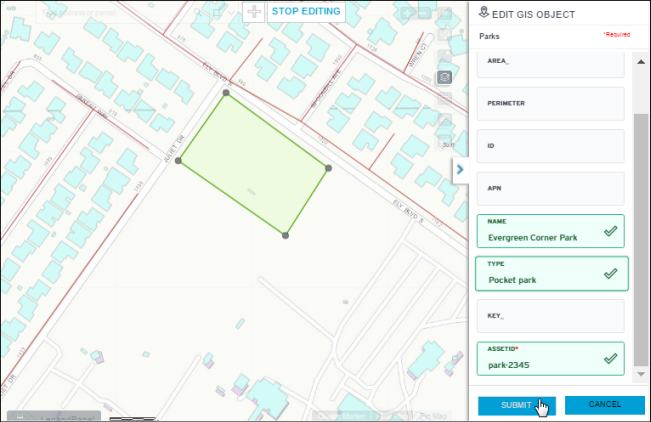
The Edit GIS Object panel validates required fields and data formats. A field entry that passes validation is highlighted as green, and a field that fails validation is highlighted as red.
If any field failed validation, the Edit GIS Object panel displays the message "n error(s) found. Click to fix" where n is the number of validation errors. For example:

To jump to the first field with the validation error (and avoid scrolling), click the message "n error(s) found. Click to fix." After fixing the error, you can click the message again to jump to the subsequent validation error. The Submit button is disabled until all field entries are valid.
-
Click Cancel on the Edit GIS Object panel to cancel any un-submitted drawing and attribute values. The Cancel button removes the un-submitted GIS object from the map and the Edit GIS Object panel. You will be prompted to confirm the cancellation of unsaved GIS objects in the edit layer session.
-
Click Submit to save the GIS object in the map service.
Once the transaction is complete, the user is taken back to the GIS tab on the record, which displays the recently added items.
- Optionally, click the icon again to add another GIS object. After
finishing a GIS object drawing and data entry, click Submit to save the
GIS object in the map service.Note: Only one GIS object can be submitted at a time. However, multiple transactions can be submitted during an edit layer session.
- Click the STOP EDITING button on the Edit Layer toolbar to exit the edit
layer session and view the new GIS object on the map, along with other mapNote: If STOP EDITING is clicked without submitting the last GIS object data entry or drawing, the user will be prompted to discard any changes or to resume the edit layer session.Note: After you stop editing, the GIS Objects panel shows only the new or updated GIS object(s) on the map layer that was just edited. This GIS Objects panel does not show GIS objects that were previously selected before you started the edit layer session. Any subsequently selected GIS objects will be appended to the GIS Objects panel.
Editing a GIS Object
To edit an existing GIS object on a map layer:
-
Start a layer edit session:
-
Click
to open the Layers widget. - Expand the layer to edit.
-
Click next to the map layer to edit. Note: If you do not see the pencil icon, you do not have edit permissions on the layer. If the pencil icon is disabled, zoom into a visible scale.
-
-
Click the GIS object to be modified. The vertices on the GIS object appear, and the Edit GIS Object panel shows the GIS object attributes.

-
To change the shape of an existing GIS object, click and drag the vertices.
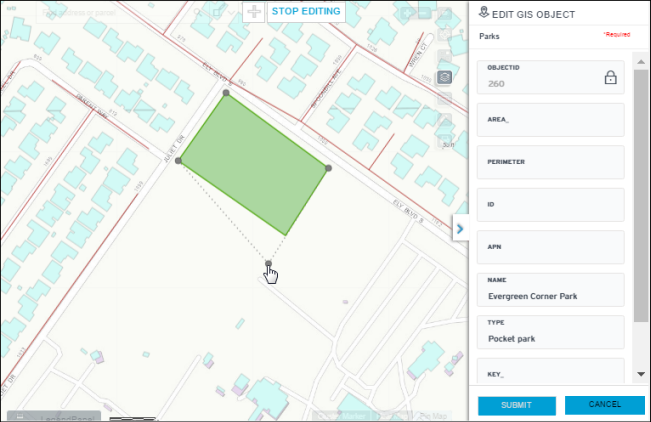
Note: A vertex cannot be added nor deleted from an existing GIS object. Modify GIS object attribute values on the Edit GIS Object panel as needed.
The Edit GIS Object panel validates required fields and data formats. A field entry that passes validation is highlighted as green, and a field entry that fails validation is highlighted as red. Multiple validation errors are listed at the top of the Edit GIS Object panel. The user can click an error message on the list to jump to the field with the validation error. The Submit button is disabled until all field entries are valid.-
Click Cancel on the Edit GIS Object panel to cancel any un-submitted modifications on the drawing and attribute values. The Cancel button reverts the GIS object back to its previously saved state, including its drawing and attributes. You will be prompted to confirm the cancellation of unsaved GIS objects in the edit layer session.
-
Click Submit to save the GIS object in the map service.
Once the transaction is complete, the Edit GIS Object panel slides out, and the new or updated GIS object is shown on the GIS Objects panel. You can view the GIS object properties to review your modifications.
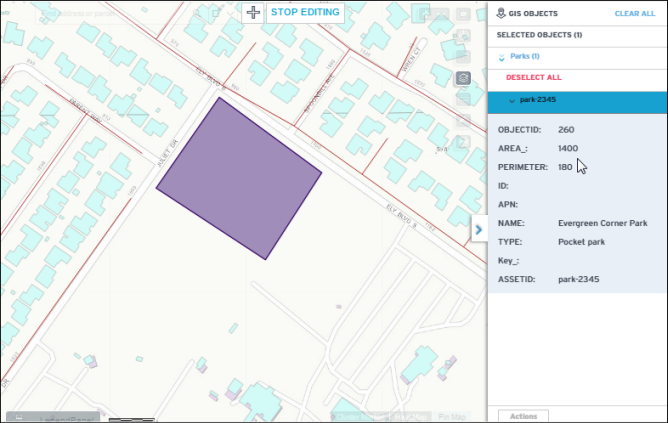
Note: The GIS Objects panel above only shows the map layer that was edited. It does not show GIS objects that are selected from other map layers. - Optionally click the icon again to add another GIS object. After
finishing a GIS object drawing and data entry, click Submit to save the
GIS object in the map service.Note: Only one GIS object can be submitted at a time. However, multiple transactions can be submitted during an edit layer session.
- Click the STOP EDITING button on the Edit Layer toolbar to exit the edit
layer session and view the modified GIS object on the map, along with other mapNote: If STOP EDITING is clicked without submitting the last GIS object data entry or drawing, the user will be prompted to discard any changes or to resume the edit layer session.
Attaching a GIS Object
While working with records in Civic Platform, you can attach GIS objects to the current record. This allows anyone working with the record to geographically visualize the impact or extent of the transaction record within the agency’s jurisdiction. For example, a permit clerk can draw the exact location of a new property including the extent of its environmental impact. The geographic data enhances the transaction record and can help with facilitating efficient and effective transaction workflows.
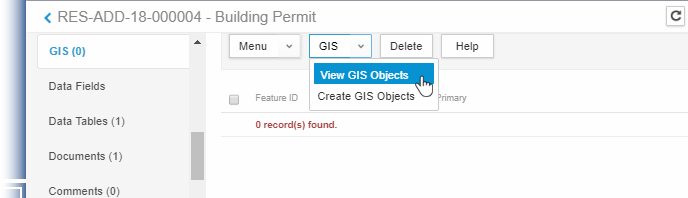
From the GIS section of a record detail, you can:
-
Attach one or more existing GIS objects to the record:
-
From the GIS menu, select Show/Select GIS Objects.
Civic Platform opens the map.
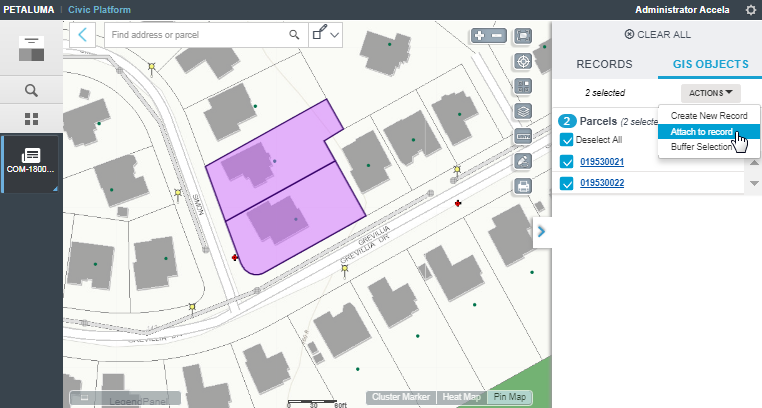
- Navigate the map to find and select the map features you want to attach to the record.
-
Click the GIS Objects tab of the map Contents slide-out panel, and choose .
The following sample diagram shows two selected parcels to be attached to the current record:
-
If you selected multiple GIS objects, Civic Platform prompts you to choose the primary GIS object. For example:

-
Click the < navigation link at the top left corner of the map to go back to the record detail.
The GIS section shows the selected GIS objects that have been attached to the record. The following sample diagram shows the two selected parcels that are now attached to a record:

-
-
Create a new GIS object before attaching it to the record:
-
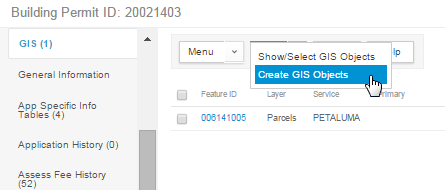
From the GIS menu, select Create GIS Objects to open the map.
- Navigate the map to the location where you want to create a map feature. See Creating and Editing Map Features.
-
-
View a GIS object on the map:
From the list of map features on the GIS section, click the Feature ID of the GIS object you want to view. The map dashboard highlights the selected GIS object. For example:

-
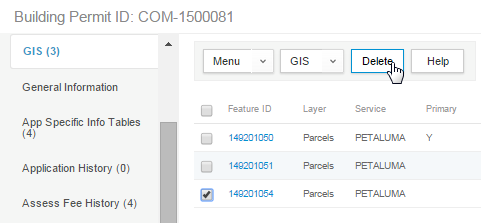
Detach a GIS object from the record:
From the list of map features on the GIS section, select the Feature ID you want to delete, and click Delete:
Editing Tips
- After double-clicking to end a GIS object drawing, you cannot add another point to the drawing. If you mistakenly ended the drawing, click Cancel on the Edit GIS Object panel, and re-draw the shape. The edit layer session currently does not support undo nor redo actions.
-
To pan to another area of the map, click-hold-drag the map to another location.
-
Zoom the map to a visible scale before starting an edit layer session. Because the edit layer session requires that the map layer is within the visible scale range, the zoom level cannot be changed during the edit layer session.
-
You can show or hide other map layers on the Layers widget during an edit layer session to view the new or modified GIS object relative to other map layers.
-
To edit a different layer, click the STOP EDITING button to exit the current edit layer session. On the Layers widget, click the layer editing tool next to the other layer.