Managing Reference Contacts
Topics
Adding a Reference Contact
You can add new contacts to your reference database. After you add a reference contact, you can look up the contact when associating contacts with a specific application, service request or other record type.
To add a reference contact
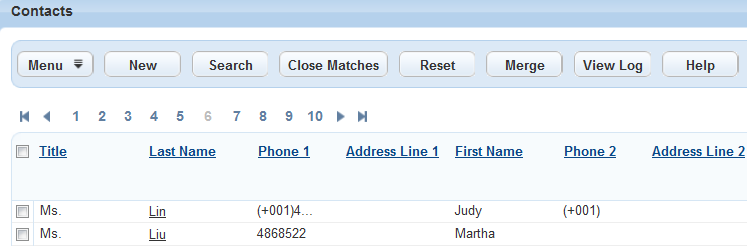
Navigate to the Contacts portlet.
Civic Platform displays a list of reference contacts.
Click New.
Civic Platform displays the contact details on the record tab.
Complete fields with available data. See Contact Detail for field definitions. If you are importing contact details from an external permitting system, see Working in the Applicant and Contact Sections.
Click Submit.
Tips on Searching for a Contact
Performing a Search
You can search for reference contacts using any combination of search criteria, including standard contact fields, template fields, associated activities, or contact addresses. See Using the Search Features for information about using search functionality in Civic Platform.
Searching by Also-Known-As Names
If you search contacts by the First, Middle, Last Name, and/or Full Name fields, Civic Platform not only checks the standard contact fields, but also the also-known-as names (see Adding Also Known As Names of a Contact) for matches.
Looking for Close Matches
Sometimes the search results do not include the contact you intend to find due to a variance in spelling. If your search does not return expected results, try using the “Close Matches” function to find contacts that may not be exact matches, but are close matches to your search criteria.
Looking for Close Matches
You can start a contact close-match search without providing value for the individual/organization flag. Civic Platform can check the contact fields you already entered, and decide whether to search for individual or organization close matches. Specifically, if any of the following fields has a value: Organization Name, FEIN, or DBA/Trade Name, Civic Platform searches for close matches in organization contacts; Otherwise, it searches for close matches in individual contacts.
Note:
Agencies can use the standard choices INDIVIDUAL_CONTACT_MATCH_CRITERIA and ORGANIZATION_CONTACT_MATCH_CRITERIA to define the close match criteria for both individual reference contacts and organization reference contacts. See the Civic Platform Configuration Reference for more information about Standard Choices. |
To look for close matches to your search criteria
Perform a standard contact search. See Using the Search Features.
Civic Platform displays the search results that exactly meet the search criteria in the contact list portlet.
Click Close Matches to view the close matches to the search criteria.
Civic Platform displays all the close matching contacts.
Editing a Reference Contact
If you need to update contact details, you can search for and modify the contacts records as needed. Your changes do not affect any applications or any service requests currently associated with the contact. Your changes do, however, affect any new applications and new service requests that users create and associate with the contact.
To edit a reference contact
Navigate to the Contacts portlet.
Civic Platform displays a list of reference contacts.
Use search to locate the contact you want to modify, then click the link for that contact to view the contact details. See Using the Search Features for information about conducting a search in Civic Platform.
Civic Platform displays the contact details on the record tabs.
Modify the fields as needed. See Contact Detail for field definitions.
Click Submit.
Adding Also Known As Names of a Contact
You can add additional (also known as, or AKA) names for a contact into Civic Platform. For example, when a person changes his/her surname upon marriage, you can add the maiden name as an ‘also known as’ name. You can delete names from this list as well using the Delete button.
To add an Also Known As name for a reference contact
Navigate to the Contacts portlet.
Civic Platform displays a list of reference contacts.
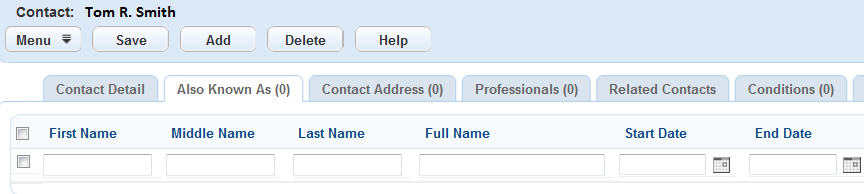
Select the Also Known As tab.
Civic Platform displays the Also Known As list portlet.
Click Add.
Civic Platform displays a new row on the Also Known As list portlet.
Complete the fields with available data.
Click Save.
Civic Platform saves the Also Known As name.
Managing Contact Addresses of a Contact
You may want to maintain the contact address information for a contact, for example, the mailing address to send mails to, or the home address of the contact.
You can either directly create a contact address for a contact, or add an existing reference address (including external addresses) as the contact address.
Your administrator can define contact address identifier fields. Civic Platform regards a contact address as duplicate if the address has duplicate identifier field values as an existing active contact address in the same contact, and forbids you from adding it to the contact.
When Civic Platform synchronizes a record contact with a reference contact, but the record contact has a duplicate contact address, the contact address in the reference contact directly replaces the contact address in the record contact.
When you add a duplicate contact address to replace the one that you are deactivating, the existing active contact address, instead of the one you are adding, replaces the one that you want to deactivate.
In previous versions, you may have added duplicate contact addresses. Civic Platform automatically filters duplicate contact addresses when you look up and select contact addresses to add in records.
Topics
Creating a Contact Address for a Contact
Depending on the configuration by your agency administrators, you can create contact addresses for a contact with different address types, such as home address, mail address, physical address.
To add a new contact address to a contact
Navigate to the Contact portlet.
Civic Platform displays the Contact detail page.
Click the Contact Address tab.
Civic Platform displays the contact address list page.
Click New.
Civic Platform displays the contact address fields.
If needed, check to see whether validation is required for your new address. Otherwise, skip to the next step.
Check whether the Validate button displays in the Contact Address tab.
Even if this button is available, your agency may require you to validate only certain types of contact addresses against an external address source.
Specify the address type and country/region of the address, and then click Validate.
One of three messages displays:
“Address validation is required” means that the address requires validation.
“No validation data source is defined” means that you are creating an address that requires no validation.
“Failed to connect to the validation data source” means that the address requires validation but Civic Platform cannot connect to the validation source.
Complete the remaining fields with available data. See Contact Address Fields for field definitions.
If the address you are adding requires validation, do the following:
Click Validate.
Civic Platform displays a list of matching addresses from the external validation source.
If you use to add an address from the list, select that address and click Select.
Civic Platform populates the contact address fields with the information from the selected address, and sets the Validated field to Yes.
If you do not want to accept any of the validated addresses as correct, click Cancel.
Civic Platform sets the Validated field of the address to No.
Click Submit.
Civic Platform displays the newly-created contact address in the contact address list page.
Adding an Existing Address as a Contact Address
Your agency administrator may allow you to add an existing reference address (including external address) as the contact address for a contact.
Note:
Changes you make in contact addresses do not update reference addresses. |
To add an existing address as contact address
Navigate to the Contact portlet.
Civic Platform displays the Contact detail page.
Click the Contact Address tab.
Civic Platform displays the contact address list page.
Click Look Up.
Civic Platform displays the Address detail page.
Enter search criteria in the address fields, then click Submit.
Civic Platform displays the results from the search.
Select the addresses that you want to add, and click Select.
Civic Platform adds the selected address in the contact address list page.
Click the Contact Address ID link for your newly-added address.
Complete any blank fields with available data (see Contact Address Fields).
Click Save.
Repeat Click the Contact Address ID link for your newly-added address. through step 8 for each contact address you want to update.
Deactivating a Contact Address
You cannot delete contact addresses. However, if a contact address becomes obsolete, you can change its status to inactive.
To deactivate a contact address
Navigate to the Contact portlet.
Civic Platform displays the Contact detail page.
Click the Contact Address tab.
Civic Platform displays the contact address list page.
Select the contact address you want to deactivate.
Click Deactivate.
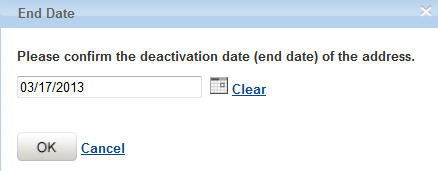
Civic Platform prompts you to enter the end date.
If the contact address you want to deactivate is the primary contact address in one or more records, you must define a new contact address and specify the end date for the selected address.
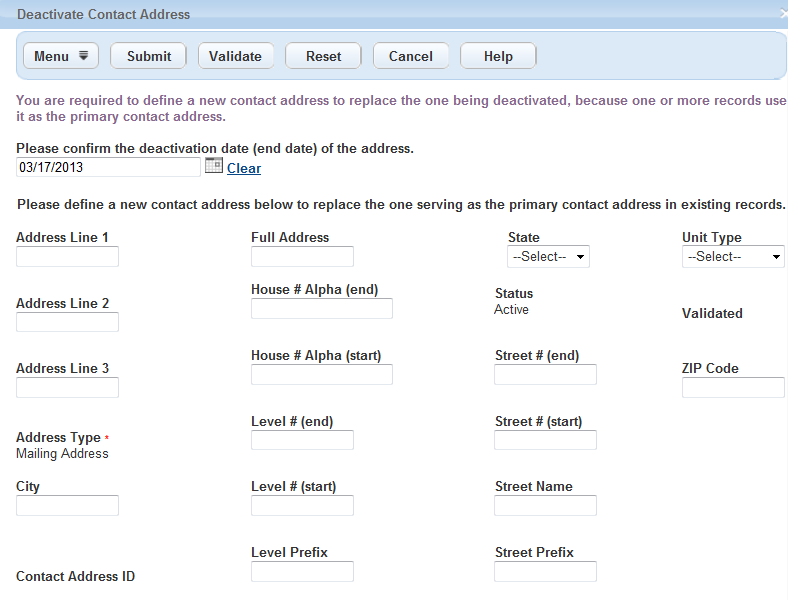
Enter the end date to deactivate the selected contact address.
If required, complete the form to define a new contact address to replace the deactivated primary address. For information on defining a new contact address, see Creating a Contact Address for a Contact.
Click Submit.
Civic Platform deactivates the selected contact address. If you define a new contact address, Civic Platform adds the new contact address to the current contact and the record contact(s) which used the selected contact address as primary.
Managing Attachments Associated with a Contact
The Documents tab for a contact lists all associated attachments. You can download and view an attachment, upload additional attachments, assign ACA permissions to the attachments, or remove an unnecessary attachment preconditioned that the attachment is not associated with a record.
After you add a document to a contact, you can look up the document and add it to the record which is associated with the contact. For more information, see Looking Up People Attachments to Associate with Records. Note that after you add a document from a contact to one or more records, Civic Platform forbids you from deleting the documents in the contact.
To download multiple documents, choose the documents and click Manage Documents > Download. Note that the Civic Platform administrator must grant Upload and Download permission on the Administration > Agency Profile > Security Policy > EDMS Access Security > {EDMS-Name} to enable multiple document downloads.
To print multiple documents, choose the documents and click Manage Documents > Print. Note that the Print option only shows if the Civic Platform administrator has configured FID 8508 Print Multiple Documents with Full Access.
For more information, see Attachments.
Building Relationships between Reference Contacts
Building relationships between reference contacts enables you to set up a contact network in Civic Platform. For example, an individual can be the CEO of an organization (contact), the manager of his team, and at the same time, the client of his lawyer. You can add associated reference contacts to an individual contact, and define the roles each one plays for the other in every association.
The reference contact relationship is a network (instead of a hierarchical tree). The relationship that you set up for two reference contacts has nothing to do with other contacts. You can configure the relationship between two reference contacts in the Contact Relationship tab of one contact, and view the relationship in both the contact details.
To manage contact relationship for a reference contact
Navigate to the Contact portlet and select the contact with which you want to work.
Civic Platform displays the Contact detail page.
Click the Contact Relationship tab.
Civic Platform displays the contact relationship list page.
To filter the contact relationship list.
Enter one or more filter criteria.
Click Filter.
Civic Platform filters the relationship list.
To relate one or more reference contacts with the current contact:
Click Look Up.
Civic Platform displays the contact search page.
Enter search criteria as appropriate, then click Submit.
Civic Platform returns a list of reference contacts that meet the search criteria.
If the search results do not contain the contact(s) you want to add, click Close Matches to retrieve close match contacts.
Select the contact(s) you want to relate with the current contact, and then click Select.
Civic Platform displays the contact role setting portlet.

Enter the relationship details.
Click Select.
Civic Platform adds the new relationship into the relationship list for both the current contact and the target contact.
To edit an existing relationship:
Click the link at the Current Contact Role column of the relationship.
Civic Platform displays the contact role setting portlet.
Update any of the fields that display, and click Submit.
Civic Platform updates the selected relationship.
To delete or deactivate an existing relationship:
Select the contact relationship that you want to remove or deactivate.
Click Delete to delete the contact relationship, or Deactivate to deactivate it.
If you delete a relationship, the relationship list no longer displays the relationship.
If you deactivate a relationship, the relationship list still displays the relationship, but the relationship status becomes Inactive.
Merging Contacts
If your agency enables merge functionality, (see 0322-Reference Merge Contacts in the Civic Platform Configuration Reference), you can select multiple contacts, select a target contact, select contact associations, and merge the contacts and their associations in the selected target contact. After you merge contacts, the target contact remains, and all the other source contacts become disabled.
Note:
Merging contacts is a permanent action. However, Civic Platform does not delete the source contacts. The contacts are merely disabled. You may be able to restore disabled contacts. See your system administrator. |
To merge contacts
Navigate to the Contact portlet.
Civic Platform displays the Contact detail page.
Select at least two enabled contacts that you want to merge. Note that you may not merge individual contacts with organization contacts.
Click Merge.
Civic Platform displays the list of contacts that you just selected.
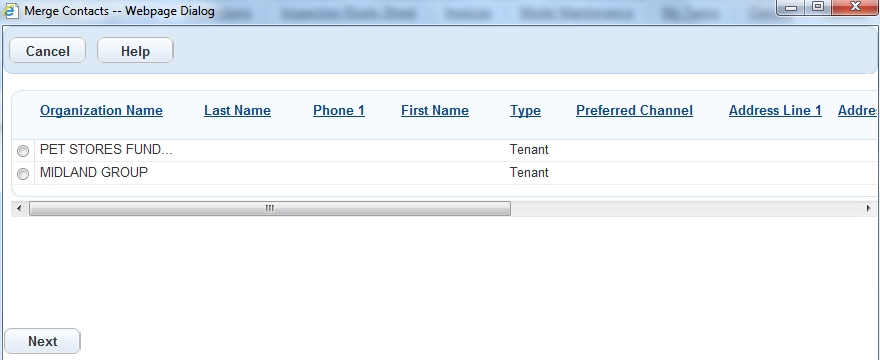
Select the contact that you want to define as the target contact, and then clickNext.
Note:The target contact is the contact to which you want to append the information from the other contacts. It is the contact you want to keep.
All the contacts that you select for merging are source contacts. All the source contacts except the target contact become disabled after the merge occurs.
Civic Platform displays the Merge Contact Data dialog.
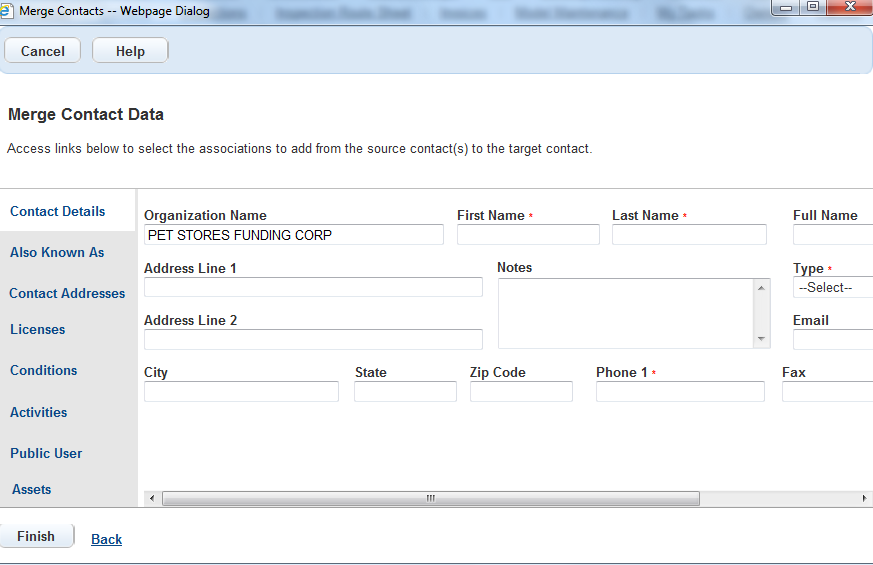
Use the links in the dialog to review and select the information and associations that you want to include in the target contact.
Contact Details
This link displays the information about the contact you selected. You must select a contact type and then confirm the other fields.
Also Known As
This link lists all the also-known-as names of all the source contacts. You can select the also-known-as names you want to add to the target contact.
Contact Addresses
This link is available if you can access the contact addresses tab (Managing Contact Addresses of a Contact). Click the link to display the contact addresses of all the source contacts. By default, Civic Platform uses the contact addresses of the contact you selected to merge to the target contact. You can select more if you want.
Licenses
This link lists all the licensed professionals associated with the source contacts. By default, Civic Platform selects all the licensed professionals to merge to the contact. You deselect any licensed professionals that you do not want to merge.
Conditions
This link lists the conditions for all the source contacts. By default, Civic Platform selects only the conditions for the contact you selected to merge to the target contact. You can select more if you want.
Activities
This link lists the activities logged in all the source contacts. By default, Civic Platform selects only the activities in the contact you selected in Select the contact that you want to define as the target contact, and then click Next. to merge to the target contact. You can select more if you want.
Public Users
This link lists the public users associated with all the source contacts. By default, Civic Platform selects only the public user associated with the contact you selected to merge to the target contact. You can select more if you want.
After merging, source contacts become disabled and they lose their association with public users. Some public users may find their account dissociated with all contacts. If this happens, the public user account becomes disabled, and the public user receives an email notification on the change.
Assets
This link lists the assets associated with all the source contacts. By default, Civic Platform selects only the assets associated with the contact you selected to merge to the target contact. You can select more if you want.
Click Finish to merge the contacts.
Civic Platform merges the selected information into the target contact, and disables the other source contacts.
Civic Platform directly merges all the documents from the source contacts to the target contact. If a record is associated with a source contact, the record attachments list still displays the document that users add to the record from the source contact, and the people attachments list of the record displays that the document is associated with the target contact.
Note:A document may fail to be merged if the document has duplicate file name with one in the target contact, or the credentials provided by the user cannot pass EDMS authentication. The document-merging failure does not affect the overall contact merging result.