Configuring Reports for Random Audit Sets
After you have enabled the random audit feature, agency users can generate audit sets and can run reports for the sets. You must configure the reports that are available to run on random audit sets.
This section provides instructions for creating reports specifically for the random audit portlet. For more general information about reports, refer to Report Manager.
To configure a random audit report
- Access the Report Manager portlet (Accessing the Report Manager Portlet).
- Either locate an existing report to assign to the random audit portlet or create a new report.
-
To assign an existing report to the random audit portlet, use the navigation tree to locate the report.
- Use the plus (+) and minus (-) buttons to find reports by category, name, permission, portlet, or workflow.
- When you have located the report, click the report’s name. Proceed
to step 4.
The report’s details display in the report portlet.
-
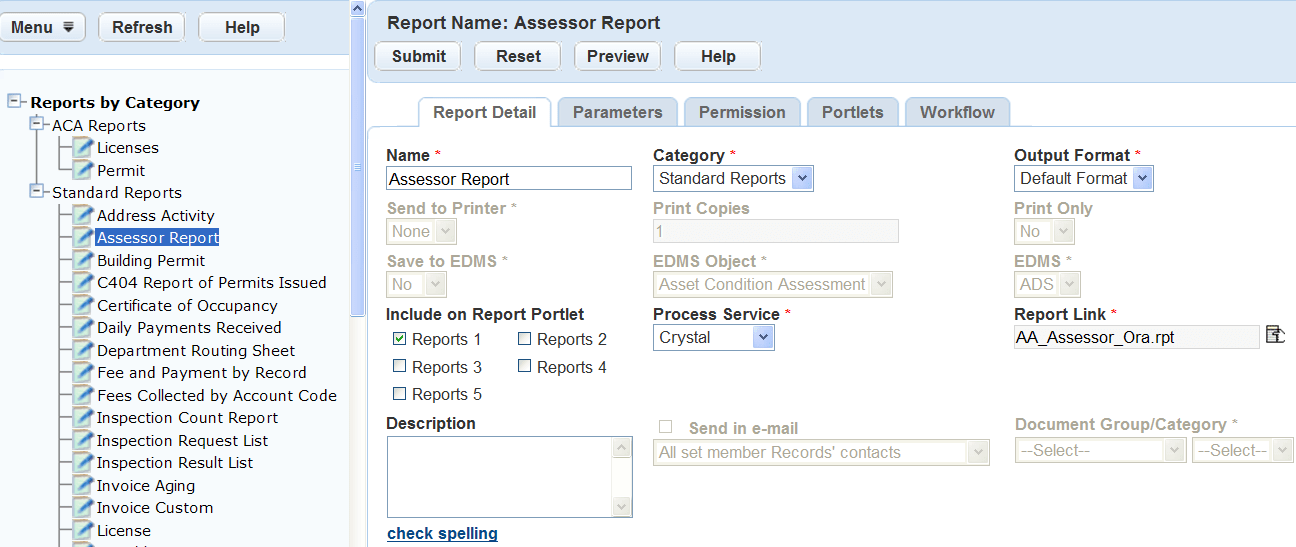
To create a new report, enter the new report information in the blank Report Detail form that displays before you select a report to view from the navigation tree. Or, right-click a category of the navigation tree, and then click New Report.
- Complete the fields that display. For a description of the fields, see Table 1.
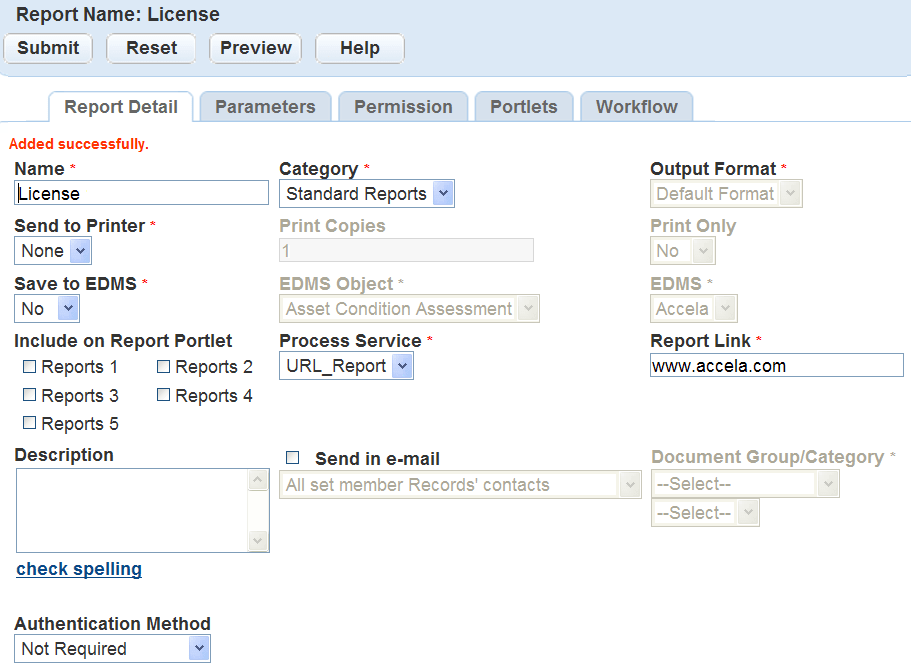
- Click Submit to save the report
detail.
Civic Platform saves the report detail and adds the report to the selected category in the navigation tree.
- Click Preview to preview the report.
If the report contains required parameters Civic Platform displays a parameter prompt window, as illustrated below:
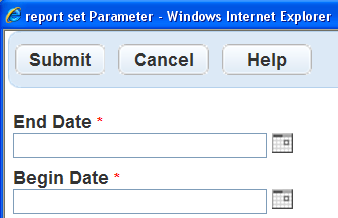
- Enter the report parameters if required.
For information on adding report parameters, see Report Manager.
Civic Platform displays the report preview in another window.
-
- To assign the desired report to the random audit portlet, click the Portlets
tab.
Civic Platform displays the list of portlets to which the report belongs.

- Click New.
Civic Platform displays the form to select a portlet to assign to the report.

- Complete the following fields:
Portlet Name Choose List - Audit Set Member List from this drop down menu. Module Choose a module from this drop down list. The report is available in the chosen portlet for all users with access to this module. Display Choose Single Window to display the report in one pop up window, and choose Multiple Windows to display each report in its own pop up window. - Click Submit.
Civic Platform saves your changes and adds the report to the list of portlets to which the report belongs.
When users hover over the Reports button in the Random Audit portlet, the report’s name displays. When users click the report’s name, the report runs on the set.
Table 1. Report Detail Category Select the appropriate category for the report. Civic Platform uses this category to organize and display the report for the user in the Reports Portlet or in form and list portlets. Default Printer Select the printer you want to use. Entering a default printer automatically prints a report when a user runs it and notifies the user that printing has occurred. To add a default printer to the list, see Report Manager.
Description Enter a description of the report. For example, enter “The inspection list report displays the total number of inspections within a specific date range, ordered by inspection type.” EDMS Select the Electronic Document Management System (EDMS) you want to save the report to. EDMS is available for all report services and types with the exception of client executables. For information on adding or removing the EDMS options in the drop-down, refer to the Accela Civic Platform Configuration Reference. EDMS Object Select the Electronic Document Management System (EDMS) object you want to save the report to. When you save a report it displays under the Documents or Attachments tab for the associated object. Options include: Record, Parcel, Workflow, and Asset Inspections. EDMS is available for all report services and types with the exception of client executables. Name Enter the name you want to display for the report in the Reports Portlet or Report Menu. Output Format Select the output format of the report. The options depend on the formats the report service supports. Options include Adobe Acrobat (.pdf), Microsoft Word (.doc), Microsoft Excel (.xls), Rich Text Format (.rtf), and CSV comma-delimited (.csv). If you leave Output Format blank, Civic Platform uses the default viewer for the report service. For information on updating output formats,Report Manager. Print Only Select Yes or No from this drop-down list to indicate whether you want to print the report. Report Link Click the Select Report Link to choose the reports available in the report directory on the server. To expand the reports list, select Expand Reports from the menu. To contract the list to display a small list of reports, select Contract Reports from the menu. Reports Portlet 1 Reports Portlet 2 Reports Portlet 3 Reports Portlet 4 Reports Portlet 5 Select the Reports portlet where you want the report to appear. A report can appear on more than one Reports portlet. For instructions and information on where the Reports portlets appear or how to make them visible, see Designing Forms for Pages. Report Service Select the report service to use for the specified report. The options selected in the drop-down filter the reports that display in the Report Link window. For information on how to update existing or add additional report services, see Report Manager. Save to EDMS Select whether or not you want to save the report to the Electronic Document Management System (EDMS) specified in the EDMS field. Choose Yes to automatically save the report to EDMS. Choose No to not save the report automatically to EDMS. Send in Email This option becomes active based on the report format you select in the Output Format box. To activate this option, you must select an output format that is not the default format. Select this option to allow users to send a report to application contacts. When you select this option, you must also designate a corresponding set of email recipients from the associated drop-down list. The record contacts in the drop-down list values refer to the contacts for the session application. Drop-down list values include:
Attach all Record ContactsThe application contacts and licensed professionals. When you select this option and users run a report, a Send in Email button appears on the report preview page. Users click this button to select email recipients.
Attach Primary Record ContactsThe application primary contacts and licensed professionals. When you select this option and users run a report, a Send in Email button appears on the report preview page. Users click this button to select email recipients.
Auto-Attach all Record ContactThe application contacts and licensed professionals. When you select this option and users run a report, Civic Platform automatically sends an email to application contacts and licensed professionals.
Auto-Attach Primary Record ContactsThe application primary contacts and licensed professionals. When you select this option and users run a report, Civic Platform automatically sends an email to primary application contacts and licensed professionals.
You can define email subject and body under the EMAIL_REPORT_SUBJECT and EMAIL_REPORT_CONTENT content customize types. The Send in Email field supports multiple languages.For more information on working with the content customize form, see Working with Communication Manager.
To configure email reports for Citizen Access Users, contact the Accela services implementation team. These scripts do not contain any event logic and an implementation specialist must review them prior to you using them. The available event scripts are: SendReportInEmail-1 and SendReportInEmail-2
Template Click Browse to select the Rich Text Format (.rtf) template report. The template can be up to 5MB. When you save a template type report, the template name displays next to the template label. This field displays only for the RTF report service type. Type Select the report type or the report engine used to launch the report. This includes Crystal, Oracle, Microsoft Reporting Services, and Accela Report Writer.