Using the Map to Create Inspections
From the map dashboard, inspectors can select parcels or addresses on the map, select records, and schedule inspections. Accela GIS also allows multiple inspections to be created on multiple records in the same transaction.
Creating Inspections from the Map
- Open the Map Dashboard.
-
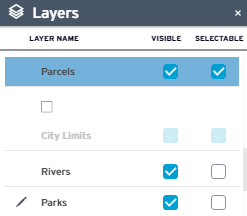
Open the Layers widget to make sure the Parcel layer is selectable on the map view:
-
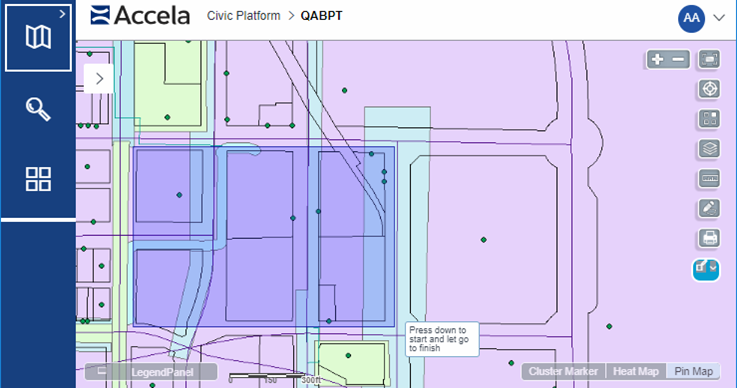
Select the parcels for inspection:
The map Contents panel shows related parcels and assets on the Record tab and the selected GIS objects on the GIS Objects tab.
-
On the Search Results tab, scroll to the Records list to select the records to be inspected
Note: The check-box is disabled for closed records. -
After selecting the records, click :
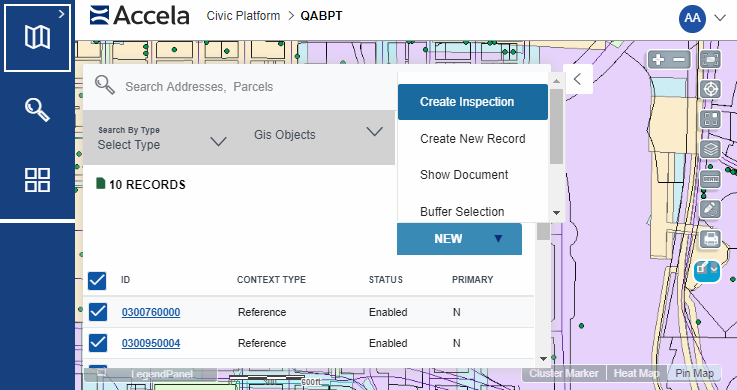 Note: The New menu activates after selecting a record.
The Inspections window displays the selected records.
-
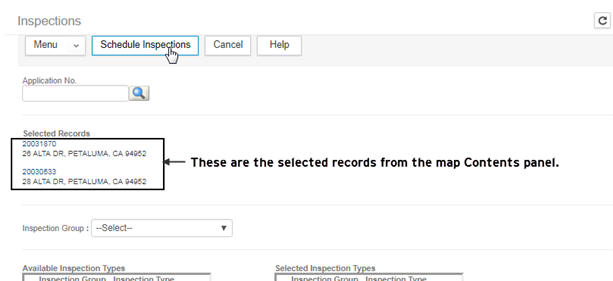
On the Inspections window, enter the inspection parameters such as inspection type, and click Schedule Inspections:
-
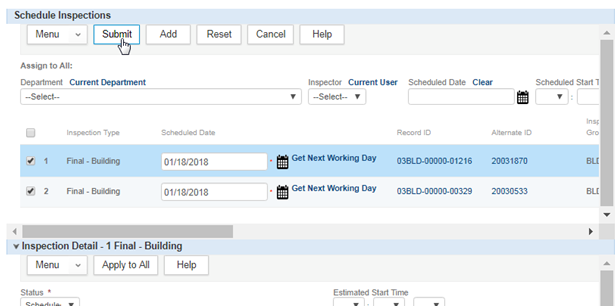
Review the inspection details, edit as necessary, and click Submit to schedule the inspection:
-
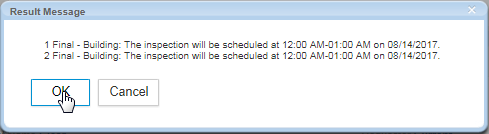
Click OK on the confirmation window:
- The check box next to a record is disabled if the record status is closed.
- The Action menu is disabled until a record is selected.
Configuration
The Create Inspections action command requires that the user (or user group) is configured with the FID 8400-Manage Inspections permission.