Invoicing
You can configure Civic Platform to assess certain fees automatically. After Civic Platform assesses fees, you can invoice fees individually or as part of a group. Each time you invoice one or more fees, Civic Platform generates a unique invoice number.
Note:
You can review itemized fee items on an invoice. However, you cannot edit or delete data after you invoice a fee. If you need to remove an invoiced fee, you can void the fee and apply a credit toward the total payment on invoice. |
Topics
Generating Invoices
You can generate an invoice from the record portlet, or you can also generate an invoice from the Payment Processing portlet. When you generate invoices from the Payment Processing portlet, your agency can configure Civic Platform so that it creates a single invoice for a group of records or separate invoices for each record.
To generate an invoice from an application
Open the Building record you want to work with and open the application for which you want to generate an invoice.
Civic Platform displays the application details.
Click the Fees tab.
Civic Platform displays a list of assessed fees.
Select the fee(s) you are invoicing.
Click Invoice.
Civic Platform generates an invoice and displays an invoice number.
To view the invoice, click the invoice number link.
Civic Platform displays the invoice in a new browser window. Use your browser’s print command to print the invoice as needed.
To generate invoices from the Payment Processing Portlet
Locate the Building record you want to work with, then navigate to the Payment Processing portlet.
Click the Invoices tab.
Civic Platform displays the Payment Processing - Invoices portlet.

Search by Record ID or State License # for the items that you want to invoice. See Using the Search Features for information about conducting a search.
Civic Platform displays a list of the fees that correspond to the Search values entered.

Search for additional Record IDs or State License #s as required until all items that you want to invoice, display.
Select each item that you want to invoice then click Invoice.
Note:You cannot create an invoice for a previously invoiced item. To easily separate the items from invoiced items, sort the displayed records by Status (click the Status column header to sort). You can also select and delete previously invoiced items from the fee list, leaving only those items that you want to invoice. To select all items simultaneously, mark the check box at the top of the Record ID column
Depending on how your agency configured Civic Platform, Civic Platform does one of the following:
It creates a single invoice for all of the selected items.
It creates a unique number for each invoiced Record ID.
It prompts you to select an invoice numbering method to use when it creates the invoices.
Civic Platform creates invoices for the selected items.
Printing Invoices
You can view invoices or print invoices individually or as a group (batch) to meet the demands of your agency.
If enabled, you can batch process groups of invoices together using the Invoice Batch portlet. From this portlet, you can collect all invoices for a given date range into a batch and print each invoice to mail to the responsible party. However, you do not need to link an invoice to a batch unless you to associate it with other invoices.
Topics
Creating an Invoice Batch
You can group invoices together to create a batch. For example, you can create batches by Licensed Professional, grouping invoices associated with their projects.
Note:
You can only associate an invoice to one batch at a time. If you want to include the invoice in the new batch, Civic Platform automatically removes it from the other one. |
To create a batch
Find the record you want to work with, then navigate to the Invoice portlet.
Civic Platform displays a list of invoices.
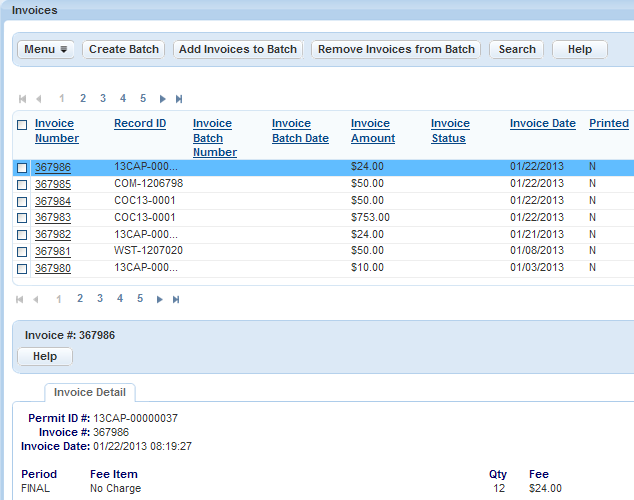
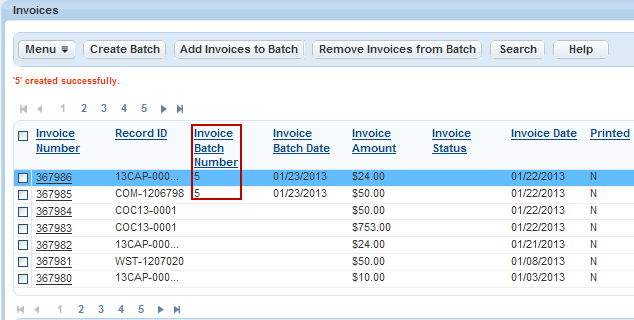
Select the invoices that you want to add to the batch.
Click Create Batch.
Civic Platform creates the new batch and then auto assigns an Invoice Batch Number.
Adding Invoices to a Batch
You can add invoices to an existing batch report as needed.
To add invoices to a batch
Find the record you want to work with, then navigate to the Invoice portlet.
Civic Platform displays a list of invoices.
Use search to locate the invoice(s) you want, then select the invoice(s) to add to the batch.
Click Add Invoices to Batch.
Civic Platform displays the Batch # pop-up window.
Enter the batch number for the batch you are adding the invoice to.
Click Submit.
Civic Platform adds the invoices to the selected batch.
Removing Invoices from a Batch
Users are able to remove invoices from a batch report. For example, a batch previously included invoices within a two-week period, but now you want to view only the last ten days.
To remove invoices from a batch
Find the record you want to work with, then navigate to the Invoice portlet.
Civic Platform displays a list of invoices.
Use search to locate the invoice(s) you want to delete, then select each invoice you want to remove from the batch.
Click Remove Invoices from Batch.
Civic Platform asks you to confirm the removal.
Click OK.
Civic Platform removes the invoice from the batch.
Printing Invoices
You can print invoices individually or in batches as required.
To print an individual invoice
Find the record you want to work with, then navigate to the Invoice portlet.
Civic Platform displays a list of invoices.
Click the invoice you want to print.
Click Reports then select Single Invoice Report from the drop-down list.
Civic Platform displays the Single Invoice Report pop-up window.
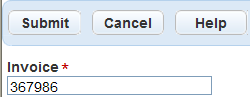
Enter the invoice number you want to print.
Note:The selected invoice number auto-populates in the Invoice field. Enter a different number if you want to print a different invoice.
Click Submit.
Civic Platform displays the Invoice Report.
Click Print.
To print an invoice batch
Find the record you want to work with, then navigate to the Invoice portlet.
Civic Platform displays a list of invoices.
Click an invoice belonging to the batch you want to print.
Click Reports, then choose Batch Invoice Report from the drop-down list
Civic Platform displays the Parameter Value Selector pop-up window.
Note:If you do not click an invoice that belongs to a batch, Civic Platform displays the error message “Please enter an existing batch number” when you click the Report button.
Enter the batch number you want to print in the ClientNum field.
Click Submit.
Civic Platform displays the Invoice Report.
Click Print to print the report.
Voiding an Invoiced Fee
When you void a fee, you reduce the total amount owed on a record, and you can then generate a new invoice. After you assess and invoice a fee, you can void the fee directly from a record, a point of sale, or the Payment Processing portlet.
Note:
If there is an existing payment toward a fee that you need to void, you can invoice the fee again, and then apply a credit toward the invoice. |
Most agencies typically restrict the ability to void an invoiced fee to supervisors or other specific individuals. If you do not see a Void button in the toolbar, you cannot void invoiced fees.
Topics
Voiding Invoiced Fees from a Record
Voiding an invoiced fee from a record allows you quickly resolve minor billing errors.
To void an invoiced fee
Navigate to the record portlet you work with and use Search to locate the record you want. Click the record ID link in the Record ID column to open the record details portlet.
Civic Platform displays the record details.
Click the Fees tab.
Civic Platform displays a list of assessed fees for the record.
Select the invoiced fee(s) that you want to void (Invoiced fees have an invoice number and an “Invoiced” status).
Click Void.
Civic Platform displays a Void Fee Item pop-up window.
Select a void reason from the Reason drop-down list, and enter any pertinent comment describing more for the Void action, if desired.
Click Submit.
Civic Platform saves your comments and closes the pop-up window.
Select the voided fees. You can identify a voided fee by viewing the Status column.
Click Invoice.
Civic Platform decreases the total fee amount and generates a new invoice.
Voiding Invoiced Fees from the Payment Processing Portlet
When you void invoiced fees from the Payment Processing portlet, you can void fees for a single record, or for multiple records simultaneously.
To void invoiced fees from the Payment Processing Portlet
Find the Building record you want to work with, then navigate to the Payment Processing portlet.
Click the Invoices tab.
Civic Platform displays the Payment Processing - Invoices portlet.
Search for the invoiced fee items that you want to void. You can search by Record ID, State License #, Receipt Number, Invoice Number, or Transaction ID.
Civic Platform displays a list items that match your search criteria.
Repeat the Search until all items that you want to void, display in the list.
Civic Platform updates the Total Payments amount as you add items to the list.
Select each item you want to void.
Click Void.
Civic Platform displays a Void Fee Item pop-up window.
Select a void reason from the Reason drop-down list, and enter any pertinent comment describing more for the Void action, if desired.
Click Submit.
Civic Platform voids the selected fee items.
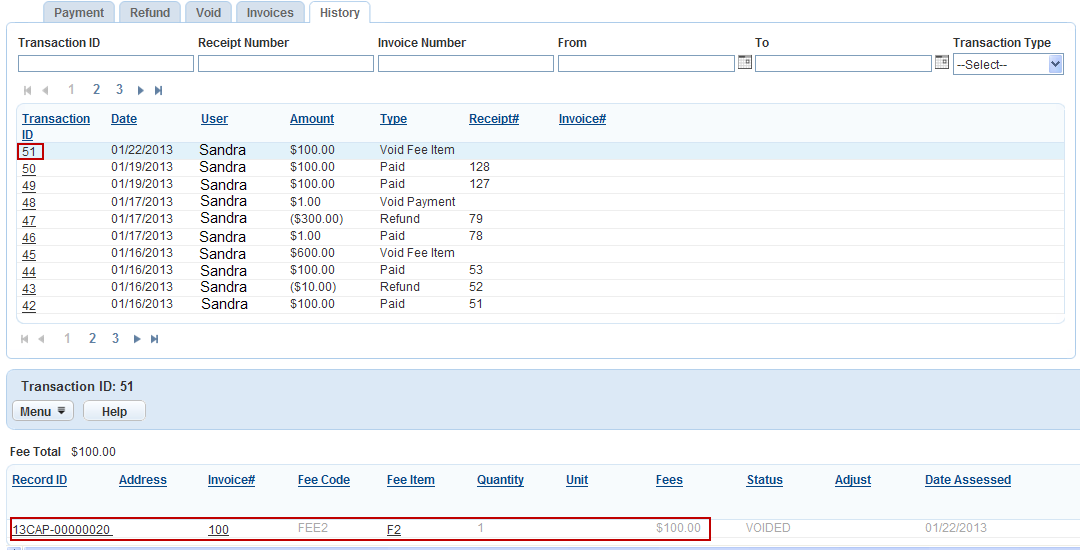
To view the transaction details, click the History tab and select the desired Transaction ID. Drill down to view additional details, as desired.
Voiding Invoiced Fees from the Point of Sale Portlet
You can void invoiced fees of a record from the Point of Sale portlet.
To void invoiced fee items from the Point of Sale portlet
Navigate to the Point of Sale portlet.
Civic Platform displays a list of point of sale transactions.
In the Transaction ID column, click the link to the point of sale transaction you want.
Civic Platform displays the transaction details.
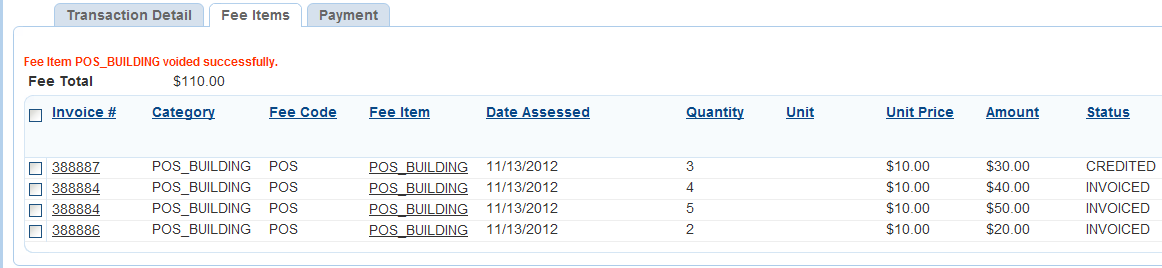
Click the Fee Items tab.
Civic Platform displays the fee items list.
Select the fee items you want to void.
Click Void.
Civic Platform displays the Void Fee Item window.
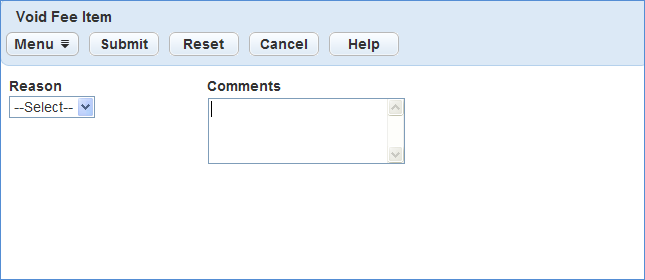
Select a reason and enter the comments.
Click Submit.
Civic Platform voids the invoiced fee items.