Maintaining Existing Sets
Sets enable you to group related records, parcels, addresses, or licensed professionals so that you can process the group as a batch. The topics in this section discuss many of the actions that you can perform while maintaining your sets.
Topics
Adding Set Members to a Set
You can add one or more set members as needed to a set. You determine which ones belong to a set and how many the set includes. There is no limit to the number of set members that you can add to a set nor to the number of sets to which a record (or a parcel, an address, or a licensed professional) can belong.
To add a record to a set
Navigate to the Set portlet.
Civic Platform displays the portlet.
Use Search to locate the desired set, then click the Set ID link for the set to which you want to add a record.
Civic Platform displays the Set ID details in the portlet.
Click the Set Member tab.
Click Look Up.
If you add a record to a record set, select Look Up Record.
Enter the search criteria to locate the records, parcels, addresses, or licensed professionals you want to add. See Using the Search Features for instructions on locating a record or an object.
Note:You can add external parcels as set members of a parcel set, or add external addresses as set members of an address set.
Click Submit.
Civic Platform displays a list of records, or parcels, addresses, or licensed professionals that match your look up criteria.
Select each record or object that you want to add to the set.
Click Submit.
Civic Platform adds the selected set members to the set.
Note:You can usually sort set members by any column in the set members list, except that if a parcel set contains external parcels, you can only sort the set members by Parcel #, not by the other columns.
Cloning a Record within a Set
You can create a new record by cloning an existing set record.
To clone a set record
Navigate to the Set portlet.
Civic Platform displays the portlet.
Use Search to locate the set with the record that you want to clone.
Civic Platform displays the search results in the Set ID portlet.
Click the Set ID link of the set with the record you want to clone.
Civic Platform displays the Set ID details.
Click the Set Member tab.
Select the record that you want to clone. You can clone only one record at a time.
Click Clone.
Civic Platform displays the cloning form.

Specify the number of clones to create.
Select the data elements that you want to copy from the source record to the newly created clone(s).
If you select a data element that allows you drill down further and select more specific data elements, click the hyperlink provided next to the data element (such as Select) to launch a dialog that allows you to choose which of the data elements to copy.
For example, if you click the Select link for Conditions of Approval, a dialog displays, prompting you to select which conditions to copy both by severity and by condition status.
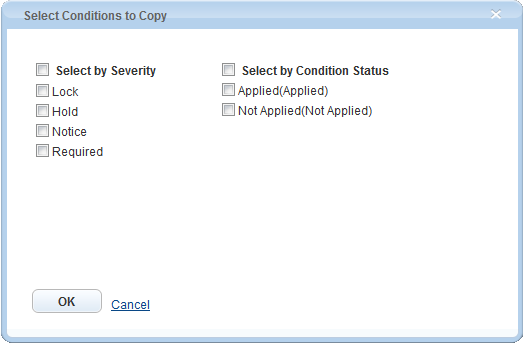
To select all of the options in a list, select the bolded option at the head of the list.
To select certain options in a list, clear the bolded option at the head of the list and select only those options you want to copy.
Click OK.
If you select Status or New Status, you can use the drop-down list to specify a particular status to copy. Otherwise, leave the drop-down list field blank to copy all status options.
Note:When you select StatusorNew Status, Civic Platform enables the Status History option and you can select it as well.
Click Submit.
Civic Platform numbers each cloned record in sequence +1 from the original record.
Civic Platform displays a message listing the number of successfully cloned records in the Set Member list portlet.
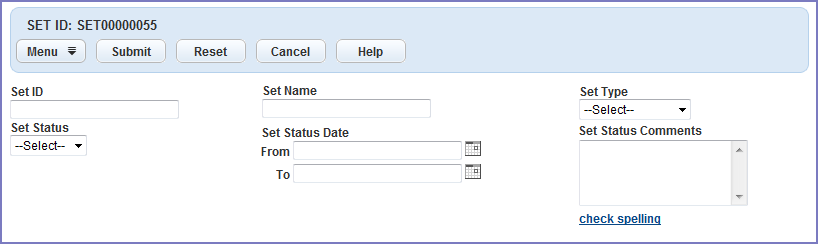
Editing Set Name and Comments
Navigate to the Set portlet.
Civic Platform displays the portlet.
Use Search to locate the set that you want to edit.
Civic Platform displays the search results in the Set ID portlet.
Click the link in the Set ID column for the set you want.
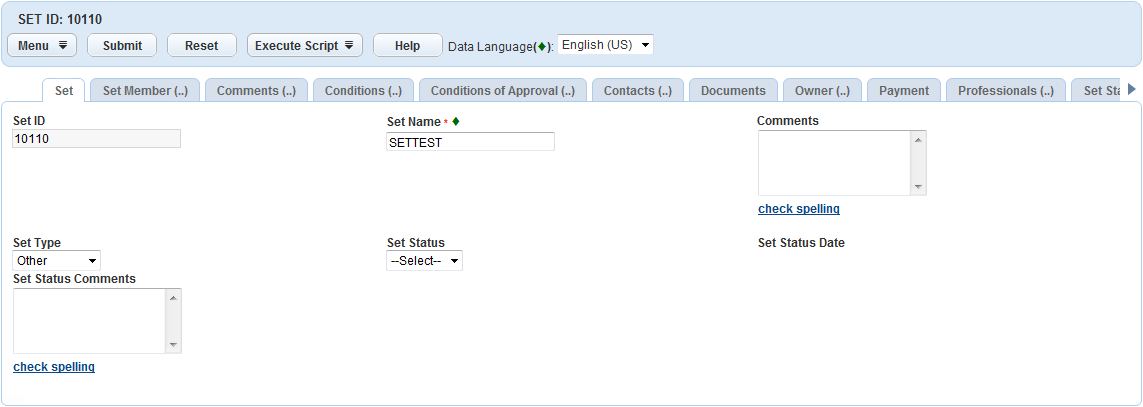
Civic Platform displays the Set tab with the Set Name and Comment fields.
Modify the fields as needed.
Click Submit.
Deleting Records from a Set
Navigate to the Set portlet.
Civic Platform displays the portlet.
Use Search to locate the set that with the record that you want to remove.
Civic Platform displays the search results in the Set ID portlet.
Click the link in the Set ID column for the Set you want.
Civic Platform displays the Set tab with the Set Name and Comment fields.
Click the Set Member tab.
Select each record that you want to remove from the set.
Click Delete.
Changing the Status in a Record Set
When you change the status of a set, Civic Platform applies the change to set members simultaneously and also displays the new status on the Status tab for the set.
Note:
An agency administrator must enable this feature (see 8364-Set Status Change in the Civic Platform Configuration Reference for more information about configuring FIDs). |
To change the status of set members
Navigate to the Set portlet.
Civic Platform displays the portlet.
Verify you are in the Record set portlet. If not, click the Records tab.
Choose the set to which you want to apply a change of status.
Civic Platform displays the set details.
Click the Status tab.
Civic Platform displays the Set Status form portlet.
Complete the fields.
Action by Use the drop-down list to select the user who is changing the status for the set. Action by Department Use the drop-down list to select the department from which the status request originated. Comments Enter any comments regarding the change of status. New Status Use the drop-down list to select the status for the set members. Status Date Enter the date or use the calendar to select the date of the change of status. Click Save.
Viewing the Set Status History
Use the Set Status History tab on the Set detail portlet to review and/or track the status history of a set. Civic Platform creates status history records each time there is a status change or a status comment change. The Set Status History is a valuable reference tool for bulk document printing, because it enables you to view the a summary of activity (based on the set status), such as who performed tasks and when.
To view set status history
Access the Set details portlet either by clicking the Set link in the Main Links section at the top of your console or by clicking the Set tab on the record detail portlet.
Click the Set Status History tab.
The Set Status History page displays.
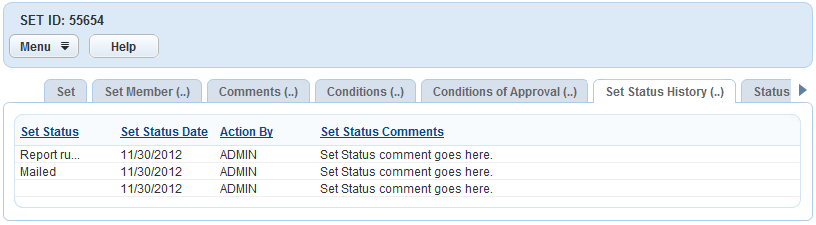
The display includes the following columns of data: Set Status, Set Status Date, and Set Status Comment.
Click any data column header to sort the set status history records by that column in ascending or descending order.
Attaching Documents to a Set
You can use the Documents secondary tab on the Set detail portlet to attach documents, such as receipts for a set payment, to an entire set of records. This ability is separate from the ability to attach documents to records that are members of a set.
Note:
If you have a set script that auto-generates a report for the set, Civic Platform saves that report to this tab. |
When you attach a document to a set, you use the same process as you use when attaching a document to a record. See Attaching Files for information about attaching documents to a record or a set.
Viewing Record Sets
The Set tab on the Record detail portlet lists the sets for which the current record is a set member. You can search the list and you can view data about the sets such as set ID, set name, set type, the latest set status and set status date, set comments and more. If you click the set ID link for a set, you can access the Set detail portlet directly.
To access the Set tab for a record
Navigate to the Record list portlet.
Either use the portlet Search functionality or invoke a QuickQuery to locate the record you want to work with.
Click the Record ID link to open the Record detail portlet.
Click the Set tab.
The Set page displays.
To view set details, click the Set ID link for the set you want to see.
The Set details portlet displays.
Updating a Task for Set Records
If you assign a task to the records in a set, you can edit ongoing task details such as record type, status, or responsible department as needed.
To update a task for set records
Navigate to the Set portlet.
Click the Records tab.
Civic Platform displays the sets.
Click a set link in the Set ID column.
Click the Workflow Status tab.
Civic Platform displays the task list.

Click the Status Change tab.
Civic Platform displays the set workflow status portlet.
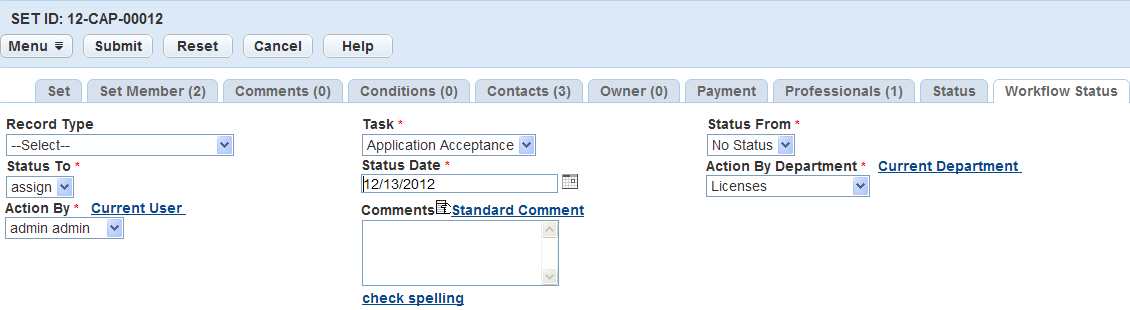
Complete the fields.
Record Type Choose a record type that you want to change its task status. Task Choose a task whose status you want to change. Status From Use to filter by a former status value. Status To Use to filter by a new status value. Status Date Use to filter by the date when the task reached its current status. Action By Department Use to filter by the department that last updated the task status. Action By Use to filter by the individual who last updated the task status. Comments Use to add the comments for the task status update. Click Submit.
Civic Platform saves the status change you made to the task.
Copying Set Members
You can copy set members from one set to another without impacting the set member list for the source set. When you copy set members, you select a target set, which is the set where you want to add members, then you select a source set, from which you want to copy members. Civic Platform adds all source set members that do not already exist in the target set to the set member list for the target set.
Note:
When you copy set members from a source set to a target set, Civic Platform does not remove the set members in the source set. Your source set remains intact. |
To copy set members from one set to another
Navigate to the Set portlet.
Civic Platform displays the portlet.
Use Search in the Set list portlet to locate the target set to which you want to add members.
Click the Set ID link for the desired target set to open the set details portlet for your target set.
Hover your mouse cursor on the Look Up button and select Look Up Set.
A search form displays.
Enter search criteria as needed to locate the source set from which you want to copy set members.
Click Submit.
A list of sets matching your search criteria displays.
Select the set that you want to use as your source set.

Click Select.
Civic Platform copies the set members from the source set to the target set.