Configuring Adobe Acrobat
If your agency uses Accela Electronic Document Review, you can make modifications to Adobe Acrobat Pro to align its functionality with the types of documents your agency plan to review, and the types of annotations you can use.
This section details both the required steps and several optional steps for you to take to set up Adobe Acrobat Pro for use with Electronic Document Review.
Topics
Required Setup
Each user must purchase and install Adobe Acrobat Pro separately for interacting with Civic Platform Electronic Document Review and the PDF files associated with projects. Click the following link to download a trial version of Adobe Acrobat Pro, or directly purchase:
http://www.adobe.com/downloads/
After the installation, you need to run the Accela Document Review Client Installer to install the Accela plug-ins and document review collaboration client.
Optional Acrobat Setup
Users can personalize the appearance of their PDF annotations, such as modifying them by color, by appearance, and by content.
Topics
Modifying your Quick Tools Toolbar
Adobe Acrobat Pro provides you with a number of annotation and graphical tools that you can use when reviewing PDF documents. You can customize the appearance and content of many of these tools, and can also decide how you want to access these tools. The Quick Tools feature gives you the ability to select which tools to appear in your toolbar. You can also elect which tool groups, such as Annotations and Drawing Markups, appear in the side panel. Note that the Civic Platform panel locates in the Tools group and not in the Comments group.
For the best practice recommendations for setting up your toolbar, see Best Practices: Adobe Acrobat Tools.
Changing the default color/appearance of annotations and drawing markups
Repeat the following steps for each annotation and drawing mark-up tool you want to modify.
Click Comment to open the side panel.
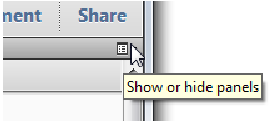
Use the Show/Hide Panels button to ensure that the Annotations and/or Drawing Markups panels display in your toolbar.
Right-click the annotation tool or drawing markup tool that you want to set up.
Click .
A Properties window displays for the type of tool that you selected.
Modify the appearance of the tool as desired using the settings on the Appearance tab.
Click OK when done.
Adobe Acrobat Pro applies the new settings every time you use the newly modified tool.
Changing the name that appears by default in comments
By default, Adobe Acrobat Pro uses your workstation name to identify you as the author of comments you insert in any document. Follow the steps below to define a different name and specify other identifying information to appear in comments, stamps, and digital signatures.
Choose from the menu in Adobe Acrobat Pro.
The Preferences window displays.
In the Categories list on the left side, find and select Commenting.
Locate and clear the Always use Log-in Name for Author name check box.
In the Categories list on the left side, find and select Identity.
Enter the fields on the Identity form with your identifying information.
Note:You cannot modify the Login Name, which is your workstation login name.
Click OK.
Finding your Measuring Tools
The Measuring Tool button is available on both the toolbar and the side panel. However, Adobe Acrobat Pro may not display it by default. If you do not see the Measuring Tools button and you anticipate that you need not use it, you can add it to your toolbar and/or side panel.
To add the Measuring Tool button to your toolbar:
- Click the Customize Quick Tools button
The Customize Quick Tools window displays, showing a list of available tools to the left.
- Click Tools > Analyze in the left pane.
- Select the Measuring Tool and move it to the right panel.
- Click OK.
To add the Measuring Tool button to your side panel:
Click Tools to display the Tools panel.
Click the Show/Hide Panels button to display a menu where you can choose which panels to display.
Select Analyze. A check mark next to the name means the panel is visible.
The Analyze panel displays. The Measuring Tool button is in that panel.
Creating and Importing Custom Stamps
In addition to the standard Adobe Acrobat stamp set and the Civic Platform stamp set provided to you with the Document Review Client Installer, you can create your own stamps and import them for use in Adobe Acrobat Pro. You can use any application with basic graphics tools to create a custom stamp, as long as the application supports printing to PDF. Word is a good option because it supports both text and graphics, and supports saving to PDF.
Custom stamps can be simple graphical images, or they can be complex, incorporating dynamic elements that use data from other sources such as the Identity form in Adobe Acrobat or the time clock on your computer. One option for creating your own stamps is by modifying the sample stamps we have provided. This section provides instructions for modifying an AEDR stamp.
To modify an AEDR stamp:
If you have not yet done so, install the custom stamps and custom buttons.
Navigate to this folder (or equivalent) on your computer:
...Users\yourlogin\AppData\Roaming\Adobe\Acrobat\10.0\StampsIdentify the stamp you want to modify, and create a copy.
Do not modify the original pdf files found in the ...\Acrobat\10.0\Stamps folder. Instead, copy/paste the stamp file you want to modify and modify the COPY instead of the original. When you rename the copy, use a unique name.
Open the newly created pdf file copy in Adobe Acrobat Pro, and make changes as needed.
Note:You can find useful editing tools in the Quick Tools window which you can access by clicking the Customize Quick Toolsbutton in your toolbar. Expand in the Quick Tools window to find a number of editing tools you can add to your toolbar. Experiment to see what tools work best for you.
Save the modified PDF file to the same folder where the other custom stamps locates (...Users\yourname\AppData\Roaming\Adobe\Acrobat\11.0\Stamps). Do not close the file.
Select to open the Document Properties window.
In the Title field, enter a group name or category name for your stamp. You can enter an existing name or a new name. For example, if you create a series of stamps for the Fire Department to use, you can enter “Fire Department” in the Title field for each stamp you want to include in the group. When you open the Stamps drop-down list, you can see Fire Department > listed. If you select Fire Department, you can see a list of every stamp for which you set Title = Fire Department.
Click OK.
Save the document.
To see your stamp in the Stamp drop-down list, restart Adobe Acrobat Pro.
Note:
For information about creating dynamic stamps in Adobe Acrobat Pro, check out http://acrobatusers.com, which is an Adobe-sponsored user community. |
Best Practices: Adobe Acrobat Tools
Accela recommends that users set up their Quick Tools toolbar as shown in the illustration below.

Customize Quick Tools button - Click to access Customize Quick Tools
Add Sticky Note button- Find in Comment > Annotations
Draw Rectangle button - Find in Comment > Drawing Markups
Draw Cloud button - Find in Comment > Drawing Markups
Measurement button - Find in Tools > Analyze
Accela Check In Revisions button - Find in Third-Party Plug-Ins > Plug-In Add-On Tools
Accela E-Codes button - Find in Third-Party Plug-Ins > Plug-In Add-On Tools
Accela Publish Comments button - Find in Third-Party Plug-Ins > Plug-In Add-On Tools
Accela Get Updates button - Find in Third-Party Plug-Ins > Plug-In Add-On Tools
More Insert Options drop-down button - Find in Tools > Pages
Crop button - Find in Tools > Pages
Stamps drop-down button - Find in Comment > Annotations
Sign Document button - Find in Tools > Sign & Certify
Bates Numbering drop-down button - Find in Tools > Pages