Working with Customized Views
Removing a Customized View
This section describes how to remove a customized form or list portlet. Removing a customized view allows users to see all available fields according to the default settings.
To remove a customized view
Identify which users access the customized view you want to remove.
For instructions to do this, see Customizing Menus, Tabs, and Drop-down Lists.
Select the customized view you want to remove.
Click Delete.
Civic Platform removes the form design, and updates the list of available forms.
Copying a Customized View
This section describes how to copy a customized view to another user or group of users. For example, if you need to make a customized record list for all users who manage fee information, you need to make the list for the billing department as well as the cashier user group. The cashier user group might not belong to the same user group as the billing department. In such a case, you can create a customized view and copy it to all necessary user groups.
To create a copy of a customized view
Select the existing customized view to use as a pattern.
For instructions to do this, see Customizing Menus, Tabs, and Drop-down Lists.
Use the Copy to Fields to identify which user or users you want to copy the customized view assignment to.
For descriptions of each field, see Table 1
Select each view you want to copy.
Click Copy in the toolbar.
Civic Platform copies the view and identifies how many customized views it successfully copied.
Table 1. Copy to Field Details Agency Select the agency to which you want to copy the customized view. Module Select the module to which you want to copy the customized view. User Group Select the user group to which you want to copy the customized view. User Select the user to which you want to copy the customized view.
Accessing and Assigning the View
To access and assign a view
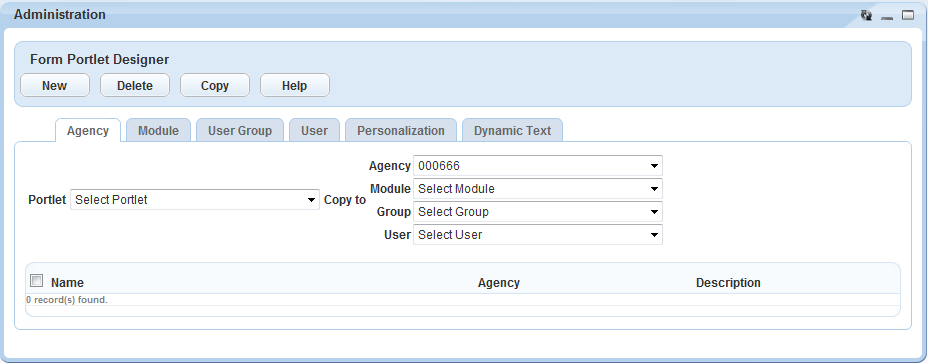
Access the Form Portlet Designer (Accessing the Form Portlet Designer).
Click one of the following tabs depending on the level of form you want to create: Agency, Module, User Group, User, Personalization, or Dynamic Text. We are using the Module tab to illustrate this example. For a list of fields, see Table 2. Depending on the level (agency, module, user group, or user) of the design you create, you might not see all of these fields.
The Personalization tab is view only. Administrators can only view and delete personal forms or lists. You cannot modify lists or forms using this tab.
Civic Platform displays a list of all custom views defined for the selected organization level.
Use the filter menus to refine the list of views.
For a list of fields, see Table 2. Depending on the level (agency, module, user group, or user) of the design you create, you might not see all of these fields.
Civic Platform updates the list to reflect the selected agency, module, user group, and view.
Choose one of the following as appropriate:
Add a new customized form. For instructions, see Creating a Form.
Add a new customized list. For instructions, see Creating a List Portlet.
Edit an existing form. For instructions, see Customizing a Form.
Edit an existing list. For instructions, see Editing a List Portlet Layout.
Remove an existing customized view. For instructions, see Removing a Customized View.
Copy an existing view. For instructions, see Copying a Customized View.
Table 2. View Filter Fields Agency Select the agency that contains the module you want to work with. Module Select the module that contains the user group you want to work with. Portlet Select the list or form view you want to work with. User Group Select the user group that contains the user you want to work with. User Select the view you want to work with. A view is either a list or a form in Civic Platform. Every list or form you can modify appears in this drop-down menu.