Plotting Items on the Map
Plotting Items on the Map
While browsing various pages, you can select items on the list and plot them on the map. It is also possible to plot items by using the Search By Type tab on the Maps Dashboard.
In this example we are searching for Records. You can also search for inspections and GIS Features. To plot records on the map:
- From the Launchpad, open the Records page.
-
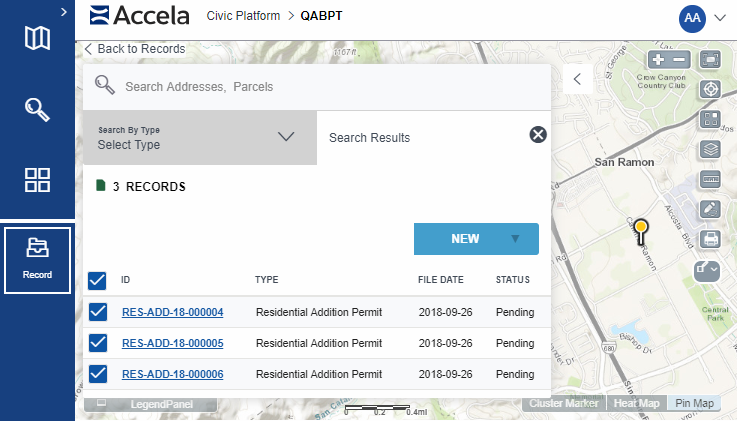
Select the records you want to plot, and click GIS. The following example shows a list of active records

The selected records display on the Search Results tab of the Contents panel, and the map plots parcels, assets, and addresses attached to the selected records:
Note:- For each selected item, the map plots any associated parcels, assets, and GIS objects. If a record has multiple addresses, the primary address is plotted.
- If there is no address-parcel relationship, the address is plotted based on the X-Y coordinate. If the X-Y coordinates are non-existent or invalid, the address is geocoded based on the geocoding configuration in the Accela GIS Administration site.
- Address intersections are not yet supported. Address geocoding is currently used to plot the geographic coordinates of address intersections on the map.
- For parcels with GIS objects and multiple addresses, the GIS object will be plotted instead of the addresses. If there are no GIS objects, the addresses will be plotted.
- The GIS feature highlighted for each item is based on the link ID field stored in the AGIS_Object table.
- Select items and click New or More to perform one of the available actions.
- Click an item link to see the details associated. To go back to the plotted map, click the current associated workspace icon. For example, if you were searching for parcels, click the Parcel icon on the Main Menu bar.
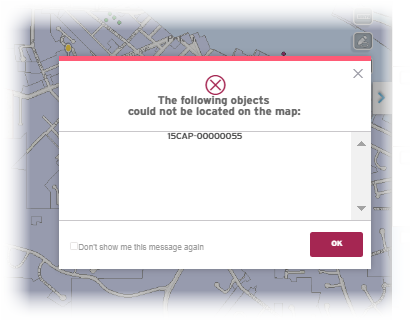
- If any of the selected items from the list could not be plotted
on the map because they do not have associated GIS objects, a
message window appears with the list of unplotted items.
Example:
-
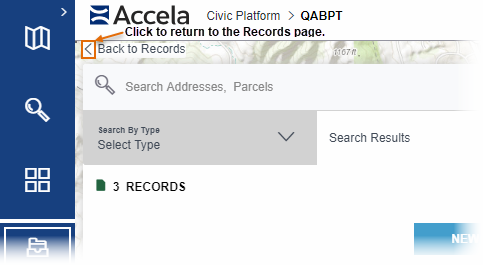
To go back to the Records page, click the back arrow: