Working with Accela Document Scan
Accela Document Scan gives users the ability to initiate a scan of a document from Civic Platform, and then attach the scanned document file to the current record.
Use Case: A citizen applies for a hunting license in person. He brings in a hard copy of the certificate that he received for taking a gun safety course, which is a requirement for a hunting license. The clerk launches a hunting application record in Civic Platform. When the agency clerk creates the application record, she navigates to the Documents tab of the application and clicks New from Scan. The clerk inputs the required information about the document and places the document in the scanner. The clerk initiates the scan process from Civic Platform, which provides the requisite scanner controls to interact with the scanner. When the scan completes, the scanned document file appears on the screen. The clerk can preview it before he saves the file to the application record.
Users can initiate the document scanning functionality from the Documents tab on the following portlets: Record, Parcel, License Professional, and Meeting.
Note:
You must install Accela Document Scan on each workstation where users plan to use a scanner to incorporate documents into Civic Platform. See the Civic Platform Installation Guide, available via the Documentation Library on Community and on the FTP site. |
Topics
Scanning a Document
To scan a document
Navigate to the Documents tab on the portlet where you want to attach a scanned document.
Click New from Scan.
A new document form displays.
Complete the fields on the form with available data, then click Continue.
A file download prompt displays.
Click Open.
The Accela Document Scan window displays. Instructions for setting up the scanner may display at the top of the window.

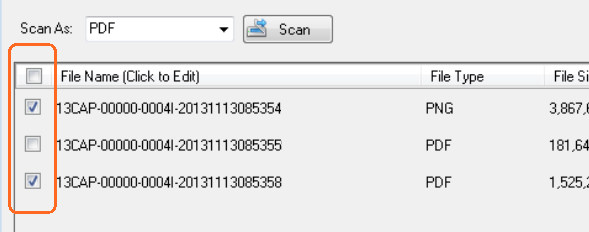
Place your document on the scanner per manufacturer instructions, then pick a Scan As value; for example, PDF or TIF.
Note:If you are scanning a multi-page document to a single, multi-page file, you must choose PDF for the Scan As value.
Click Scan.
When the scan is complete, the scanned document file appears in the File Name list on the Accela Document Scan window.
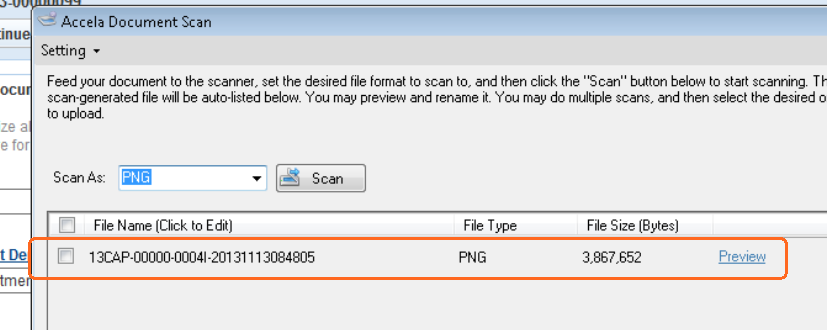
Click Preview to view the scanned document file.
If you want to change the name of the file, click the file name and enter a new name. Do not worry about a filename extension.
Note:By default, scanned document file names use this format:
Record attachments: record number + time/date sequence
Parcel attachments: parcel number + time/date sequence
Licensed professional or meeting attachments: unique ID stored in the database + time/date sequence
If you have more documents to scan or if you need to re-scan any document, repeat steps 4-7. If you need to switch scanners (For example, your agency may have one scanner to handle single page documents, and another scanner to handle multi-page documents), see Switching Scanners for information about switching to another scanner.
Note:If you are scanning multiple documents, you can adjust document settings such as Document Group and Citizen Access Permissions after you upload your scanned documents.
When you finish scanning documents, select the document files you want to upload to Civic Platform. You can select all files by marking the check box in the title bar (next to File Name).
Click Upload.
Selected document files upload to Civic Platform. When done, Accela Document Scan removes uploaded files from the queue.
Click Setting in the upper left corner, then select Exit.
The Accela Document Scan window closes, and you return to the Civic Platform document form (see illustration in step 2).
To scan more documents, follow steps 3-11. Otherwise, click Back to return to the Document list tab.
Your new document scan files display in the list.
Switching Scanners
If you are scanning more than one document and you need to use a different scanner; for example, one that supports multi-page documents, Accela Document Scan enables you to make the switch from within the Accela Document Scan window.
To switch to a different scanner
Follow steps 1-3 in Scanning a Document to display the Accela Document Scan window.
Click Setting in the upper left corner.
Choose Select Scanner from the command menu.
A device list dialog displays.

Choose the scanner you want to use from the Device List drop-down list.
Click OK.