Working with Meeting Calendars
You create, review and modify meeting agendas and other meeting details in the Civic Platform Calendar portlet. When you schedule a meeting, you use a meeting calendar and meeting type.
Topics
Viewing and Finding Scheduled Calendar Items
You can navigate to inspections, meetings, and user events from the Calendars portlet. You can also find scheduled meetings from the Records portlet and the My Tasks portlet.
To view or find a scheduled calendar item
View the scheduled item from the Calendars portlet.
Access the Calendars portlet.
Civic Platform displays a portlet for navigating calendars.

Note:You can navigate meeting calendars by type, name, permission, inspection type, or department.
Expand the calendar categories on the left side panel until you find the calendar for which you want to view scheduled items.
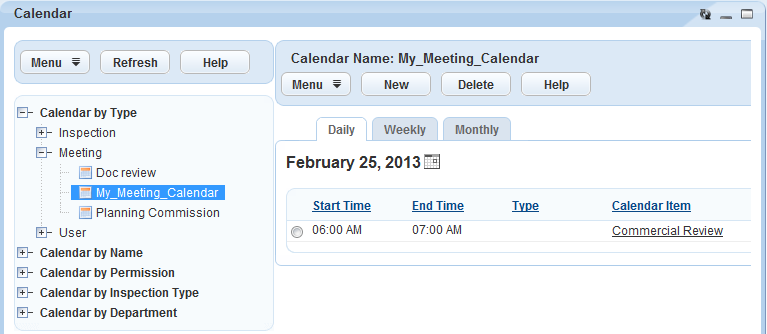
Civic Platform displays scheduled items, that use the selected calendar, under the Daily, Weekly, and Monthly tabs.
View or find meetings from the My Tasks portlet.
Access the My Tasks portlet (see Navigating with Main Links in the Accela Civic Platform User Guide).
To view meetings, click the Meetings tab.
Civic Platform displays your meetings.
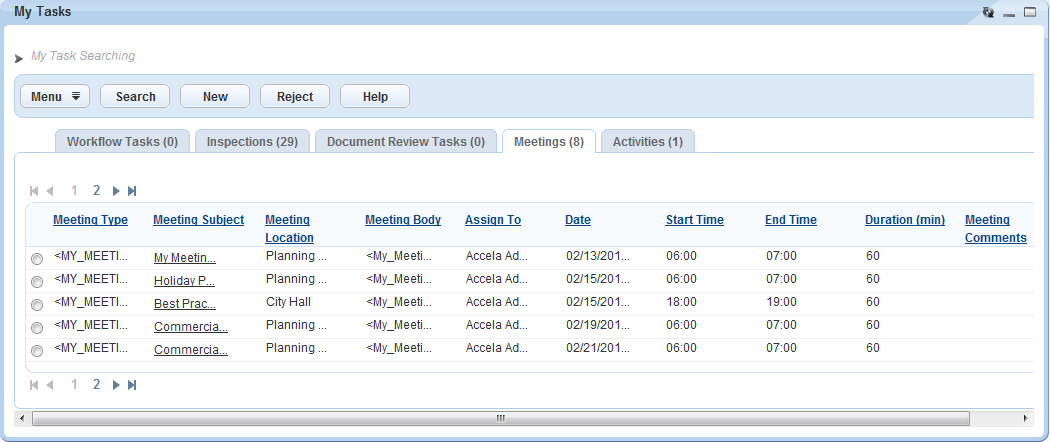
Find meetings.
Click Search.
Civic Platform displays the meeting search form.
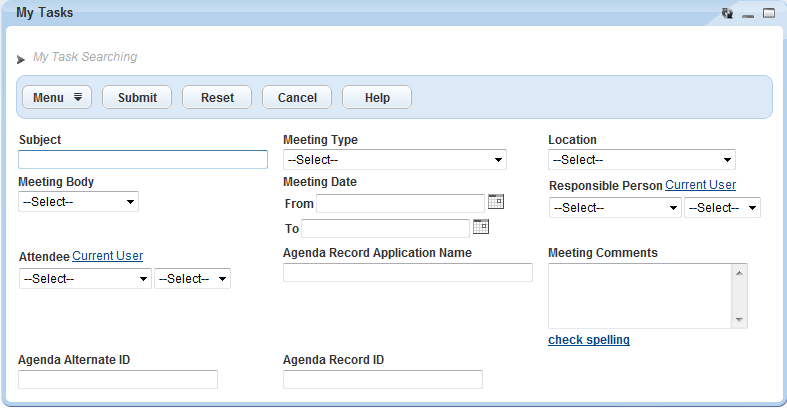
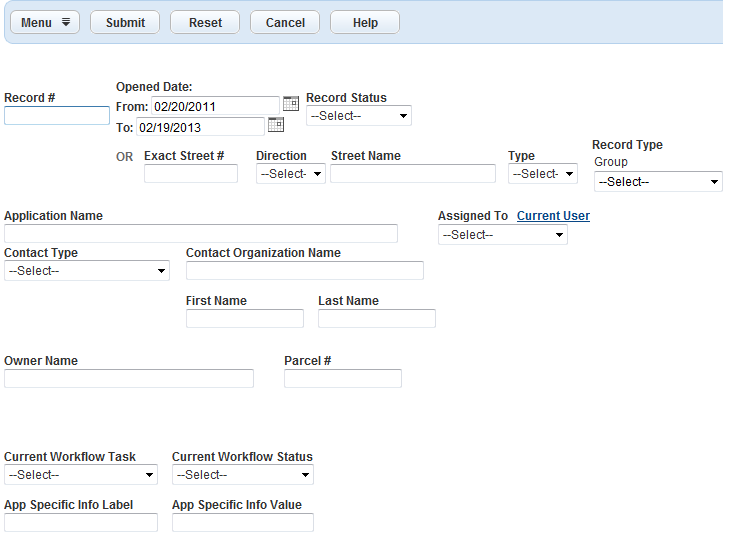
Complete search criteria in accordance with Meeting Search Criteria.
-
Click Submit.
Civic Platform displays the search results.
Table 1. Meeting Search Criteria Label Description Subject Field containing the meeting subject Meeting Type Drop-down list containing the available meeting type values. You determine value options by the MEETING_TYPE Standard Choice. Location Drop-down list containing the meeting location values. You determine value options by the MEETING LOCATION Standard Choice. Responsible Person First drop-down list is department, second drop-down list is name Meeting Date, From\To Search by a range of meeting dates. Meeting Body Drop-down list containing meeting body values. You determine value options by the MEETING BODY Standard Choice. Meeting Comments Text area Attendee If meeting includes the specified attendee, you can search the meeting by the attendee. Agenda Record ID Search meeting by meeting associated record ID. Agenda Alternate ID Search meeting by meeting an alternate record ID. Agenda Record Application Name Search meeting by meeting associated record application name.
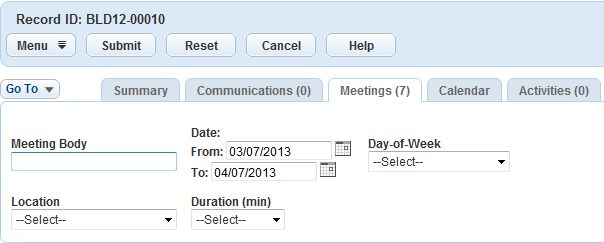
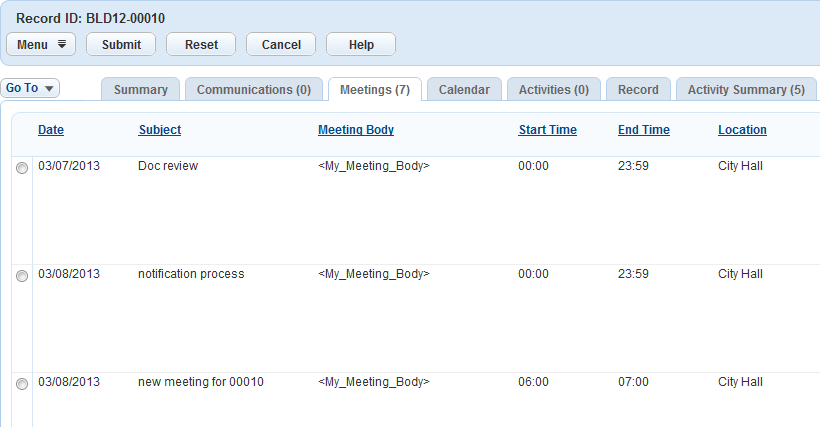
View meetings from the Records portlet
Access the Records portlet (see Navigating with Main Links in the Accela Civic Platform User Guide).
Select the record for which you want to access the associated meetings.
Click the Meetings tab in the record details portlet.
Civic Platform displays meetings for which the selected record is an agenda item.
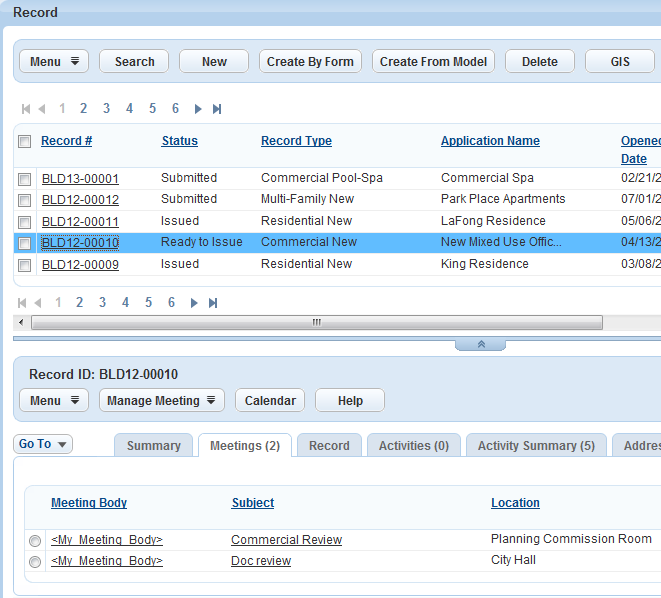
Click the Calendars tab in the record details portlet.
Civic Platform displays the meetings on the monthly calendar.

Scheduling a Meeting
You can schedule a new meeting from the Calendars portlet, the Records portlet, or the My Tasks portlet. When you schedule a meeting, you first create the meeting by submitting details, which include the meeting date, time, location, the maximum number of records for the agenda, and so forth. After you create the meeting, you can modify other tabs of information related to the meeting.
To schedule a new meeting
Schedule a meeting from the Calendar portlet.
Find the calendar for which you want to schedule an item (Viewing and Finding Scheduled Calendar Items).
Click New.
Schedule a meeting from the Records portlet.
Access the Records portlet (see Navigating with Main Links in the Accela Civic Platform User Guide).
Access the record for which you want to schedule a meeting.
Hover over the Manage Meeting drop-down button and select New Meeting.
Schedule a new meeting from the My Tasks portlet.
Access the My Tasks portlet (see Navigating with Main Links in the Accela Civic Platform User Guide).
Click the Meetings tab.
Click New.
Civic Platform displays the calendar item details page.

Complete the fields in accordance with Calendar Item Details.
Note:If the meeting type definition includes a template specification, additional ASI fields may appear on the details page along with the standard details fields. The fields that appear depend on the template specification for the meeting type.
Note:The fields to complete depends on the calendar type (meeting, agency holiday, user) for which you are scheduling an item.
Click Submit.
Civic Platform creates the new calendar item.
Modifying Meeting Details
You can modify meeting details through the Calendar portlet, Record portlet, or My Tasks portlet. For example, you may need to change the meeting date, time, location, or status. If your agency administrator configures meeting notification e-mails, you can email a meeting change notification to meeting attendees.
To modify meeting details
Modify meeting details from the Calendars portlet.
Find the calendar item for which you want to modify the schedule details (Viewing and Finding Scheduled Calendar Items).
Click the link to the specific calendar item of interest.
Civic Platform displays meeting details.
Modify meeting details from the My Tasks portlet.
Access the My Tasks portlet (see Navigating with Main Links in the Accela Civic Platform User Guide).
Click the Meetings tab.
Click the link for the meeting you want to modify.
Civic Platform displays meeting details.
Modify meeting details from the Records portlet.
Access the Records portlet (see Navigating with Main Links in the Accela Civic Platform User Guide).
Select the record for which you want to modify meeting details.
Click the Meetings tab in the record details portlet.
Civic Platform displays meetings for which the selected record is an agenda item.
Click the link for the meeting you want to modify.
Civic Platform displays meeting details.
Modify meeting details, as required (Calendar Item Details).
Click Submit.
Scheduling or Rescheduling a Meeting from the Records Portlet
To schedule or reschedule meeting from the Records portlet
Access the Records portlet (see Navigating with Main Links in the Accela Civic Platform User Guide).
Select the record for which you want to schedule or reschedule a meeting.
Click the Meetings tab in the record details portlet.
Civic Platform displays meetings for which the selected record is an agenda item.
Select the option next to the meeting you want to schedule or reschedule.
Hover over the Manage Meeting drop-down button and select Schedule Meeting or Reschedule Meeting.
Civic Platform displays parameters for the proposed rescheduling.
Enter the specified parameters.
Click Submit.
Civic Platform displays a list of scheduled meetings that match your specified parameters.
Select the option for the meeting you want to schedule or reschedule.
Click Submit.
Modify meeting details as required (Modifying Meeting Details).
Civic Platform assigns the record to the meeting and sets the assign status to Scheduled or Rescheduled.
Rejecting a Meeting
To reject a meeting
Access the My Tasks portlet (see Navigating with Main Links in the Accela Civic Platform User Guide).
Click the Meetings tab.
Civic Platform displays your meetings.
Click the option for the meeting you want to reject.
Click Reject.
Civic Platform removes you from the meeting and sends an email notification to the responsible person.
Note:You can only reject meetings assigned to you. Only internal users can reject a meeting.
Note:If you previously received an Outlook invitation to the meeting, Civic Platform generates a normal Outlook email for the rejection, not an Outlook rejection email.
Cancelling a Meeting
You can cancel a meeting, associated with a specific record, from the Records portlet.
To cancel a meeting
Access the Records portlet (see Navigating with Main Links in the Civic Platform User Guide).
Select the record for which you want to cancel a meeting.
Click the Meetings tab in the record details portlet.
Select the meeting you want to cancel.
Hover over the Manage Meeting drop-down button and select Cancel Meeting.
Civic Platform displays the dialog to enter a cancellation reason.
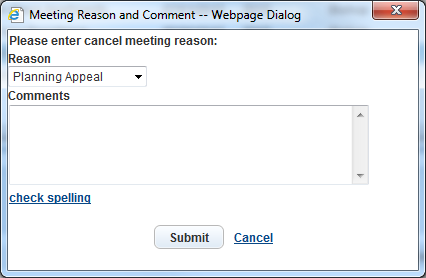
Complete the dialog.
Click Submit.
Civic Platform removes the meeting from the calendar and changes the assign status to Cancelled.
Deleting a Meeting or User Event
You can delete a scheduled meeting or delete a user event. To cancel an inspection, see Cancelling an Inspection
To delete a calendar item
Find the calendar item for which you want to modify the schedule details (Viewing and Finding Scheduled Calendar Items).
Click the Daily, Weekly, or Monthly tab.
Click the link to the specific calendar item of interest.
Civic Platform displays the schedule details for the selected calendar item.
Note:You must remove all agenda items (records) from a meeting calendar item before you can delete it.
Click Delete.
Civic Platform deletes the calendar item.
Working with Meeting Agendas and Voting
To work with meeting agendas and votes
Find the calendar item for which you want to set the agenda and voting (Viewing and Finding Scheduled Calendar Items).
Click the Daily, Weekly, or Monthly tab.
Click the link to the specific calendar item of interest.
Civic Platform displays the schedule details for the selected calendar item.
Click the Agenda & Vote tab.
Civic Platform displays current record(s) comprising the agenda, if any.
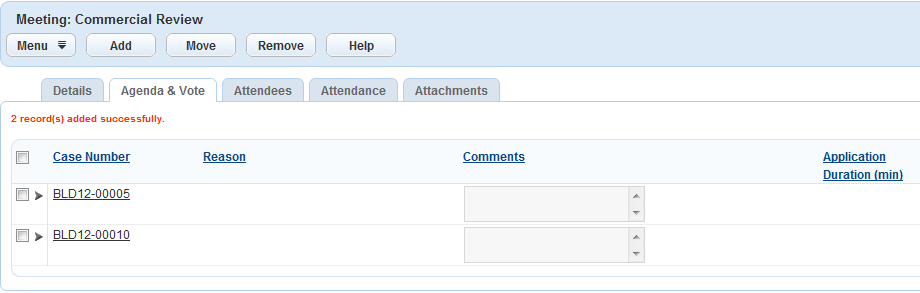
If required, add a record to the agenda.
Click Add.
Civic Platform displays details for setting the agenda and vote.
Complete the fields. See Application Record Fields for field definitions.
Civic Platform displays records matching your search criteria.
Select the record(s) you want to add to the agenda.
Click Submit.
Civic Platform adds the selected record to the agenda.
If required, remove a record from the agenda.
Select the records you want to remove from the agenda.
Click Remove.
Civic Platform displays the Meeting Reason and Comment dialog.
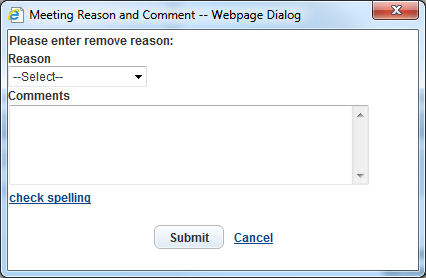
Select a reason and enter optional comments.
Click Submit.
Civic Platform removes the record from the agenda.
If required, vote on an agenda record.
Click the triangle symbol next to an agenda record to display the voting section.
Civic Platform displays voting options for meeting attendees with voting privileges.

Note:Only Civic Platform internal users can vote. A responsible internal user can serve as a proxy to vote for external users.
If required, remove an attendee from the voting roster.
Select the attendee you want to remove from the voting roster.
Click Delete Voter.
Civic Platform removes the attendee from the voting roster.
If required, add an attendee to the voting roster.
Click Add Voter.
Civic Platform displays the list of attendees not on the voting roster.
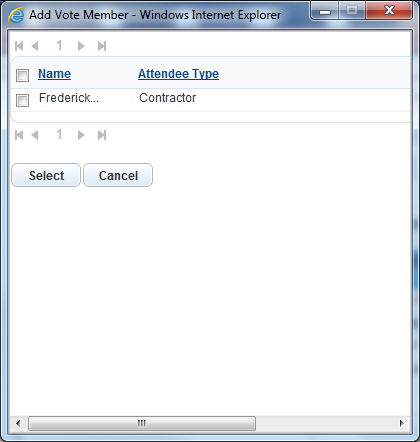
Select the attendee.
Click Select.
Civic Platform adds the selected attendee to the voting roster.
Select the vote result from the drop-down list.
Click Save.
Civic Platform saves the voting results.
Viewing a Meeting Agenda
The records associated with a meeting determine the meeting agenda. You can review the meeting agenda for each scheduled hearing.
To view a meeting agenda
View or find the meeting for which you want to view the agenda (Viewing and Finding Scheduled Calendar Items).
-
Click the link to the meeting.
Civic Platform displays meeting details.
Click the Agenda & Vote tab.
Civic Platform displays the records associated with the meeting.
Adding and Removing Meeting Attendees
To set meeting attendees
Find the calendar item for which you want to set the attendees (Viewing and Finding Scheduled Calendar Items).
Click the Daily, Weekly, or Monthly tab.
Click the link to the specific calendar item of interest.
Civic Platform displays the schedule details for the selected calendar item.
Click the Attendees tab.
Civic Platform displays the availability of current attendees.

If required, add one or more attendees.
Click Add.
Civic Platform displays a form for adding attendees.
Select the users or groups you want to add as attendees.
Click Save.
Civic Platform adds the selected users and groups to the meeting.
If required, remove one or more attendees.
Select the users or groups you want to remove.
Click Remove.
Civic Platform removes the selected users or groups from the meeting.
Setting Meeting Attendance
To set meeting attendance
Find the calendar item for which you want to set the attendance (Viewing and Finding Scheduled Calendar Items).
Click the Daily, Weekly, or Monthly tab.
Click the link to the specific calendar item of interest.
Civic Platform displays the schedule details for the selected calendar item.
Click the Attendance tab.
Civic Platform displays details for setting the attendance.
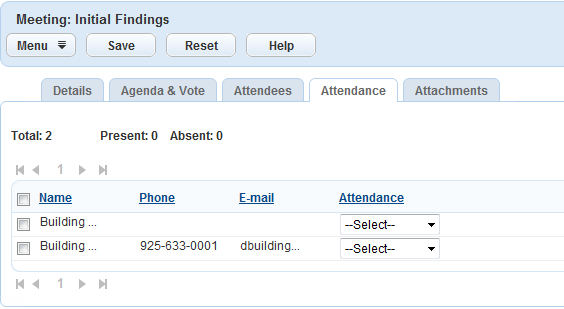
For each attendee, set their attendance from the drop-down list as Present or Absent.
Click Save.
Civic Platform displays the count of present and absent attendees.
Setting Meeting Attachments
You can attach documents to a meeting, before or after the meeting. You can attach documents directly to the meeting, or you can also attach documents from agenda items (records) specified for the meeting.
To set meeting attachments
Find the calendar item for which you want to set the attachments (Viewing and Finding Scheduled Calendar Items).
Click the Daily, Weekly, or Monthly tab.
Click the link to the specific meeting of interest.
Civic Platform displays the schedule details for the selected meeting.
Click the Attachments tab.
Civic Platform displays details for setting the attachments.
If required, add one or more attachments to your meeting (see Attachments).
If required, add a record attachment.
Click the Record Attachments option.
Civic Platform displays attachments to the records that comprise the agenda of the meeting (Working with Meeting Agendas and Voting).
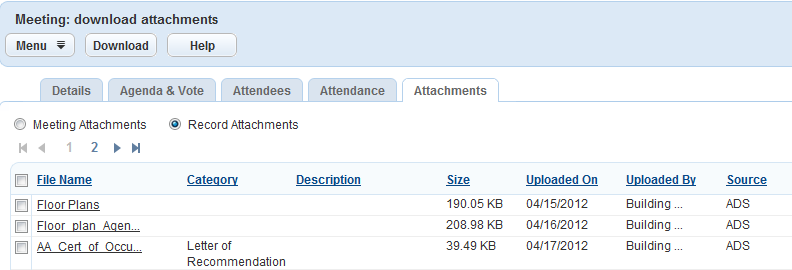
Select the attachment(s) you want to download.
Click Download.
Civic Platform downloads the selected attachment(s).
Click Submit.
Sending Meeting Notifications
When you send a meeting calendar item, Civic Platform can send an email of changes to designated recipients. The meeting type for the meeting determines when to send a notification, who to send the notification to, and the format to use for the notification.
To send a meeting notification
Find the calendar item for which you want to send a notification (Viewing and Finding Scheduled Calendar Items).
Click the Daily, Weekly, or Monthly tab.
Click the link to the specific calendar item of interest.
Click Send.
Civic Platform displays the email Notification page.
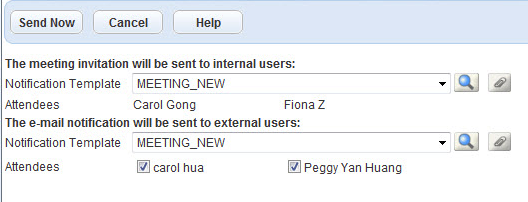
If your agency implements Microsoft Outlook integration, Civic Platform also displays meeting notification information for Microsoft Outlook.
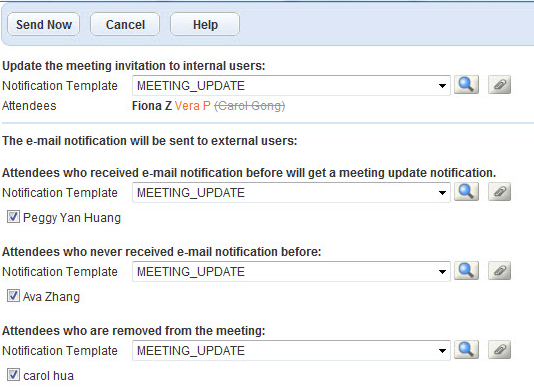
For Microsoft Outlook invites, Accela Civic Platform highlights changes to location, date, time, and internal attendees as shown in the image below.
Complete the form in accordance with Email Notification Form Fields.
Table 2. Email Notification Form Fields Label Description Outlook Invite for Internal Meeting Attendees Template Drop-down list of available email templates for internal users, and list of current internal user meeting attendees. Outlook Invite for External Meeting Attendees External Template Drop-down list of available email templates for external users, and list of external user meeting attendees.
Note:The email notification form lists attendees who received a prior email notification.
If required, modify or view the notification template.
-
Click the
 icon to view or modify the notification template.
Civic Platform displays the Notification Template detail portlet.

See the section on Communication Manager in the Accela Civic Platform Release Notes and Addendum for information on creating and modifying notification templates.
Click Save.
Note:You can view the template if you do not have permission to update the template.
-
If required, add an attachment to the email notice.
-
Hover over the attach icon
 and click the Attach
Document link.
and click the Attach
Document link.
Civic Platform displays currently attached documents.
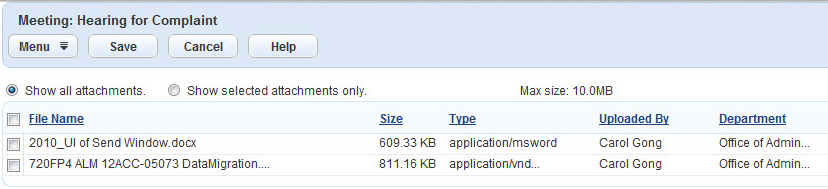
Select files you want attached to the email notice.
Click Select.
Note:The file size for all selected attachments must not exceed the maximum size. To change the maximum size, see Communication Manager > General Settings > Attachments settings > Field “Maximum Size of Total Files.”
-
Click Send Now.
Civic Platform sends the notification to selected attendees by standard email, Outlook invite, and Civic Platform alerts.
Note:If your agency implements Civic Platform integration with Microsoft Outlook, Civic Platform meeting invites also appear as Microsoft Office meeting invites. Microsoft Office does not communicate action on Civic Platform meeting invites, acceptance or rejection for example, back to Civic Platform.