Configuring the Point of Sale
Complete the steps in order as presented to ensure that the point of sale feature works properly. Refer to the following sections for complete details.
In summary, to configure the point of sale:
- Set the point of sale Function Identifications (FID) 8288 Fees Point of Sale, and 8289 Fees Point of Sale Refund to Full Access, and set the user group access level.
- Set up a point of sale fee schedule for each Accela module your agency uses. For information on managing fee schedules, see Understanding Fee Items.
- Create two Standard Choices: First create POINT_OF_SALE_TYPE and then create
POINT_OF_SALE_FEE_SCHEDULE. Set the values for each of these Standard Choices
according to the instructions in the Civic Platform Configuration Reference.
It is important to specify correct values for these Standard Choices to ensure proper implementation of this feature. The Civic Platform Configuration Reference provides complete documentation for setting up these Standard Choices.
- Configure the receipt sequence and its mask definition. For a general discussion of the Sequence Generator function, see Defining Sequences, Masks, and Autonumbering.
After you complete these steps, point of sale fees work like all other fees in Civic Platform. Civic Platform adds, assesses, and processes fee items through a cashier payment without an associated application.
Because Civic Platform automatically invoices point of sale fee items, users can only add and void fee items. When users apply payment in point of sale, Civic Platform processes it automatically without a payment apply screen.
Setting Up a Point of Sale Fee Item and Fee Schedule
When setting up the point of sale fee item the fee schedule must match the Standard Choice value exactly. Both the fee item code and the fee schedule have a maximum character length of 12.
To set up a point of sale fee item
- Access the Classic Administration page (Accessing Classic Administration).
- Navigate to .
- Click Add.
Civic Platform displays the Fee Item - Add page.
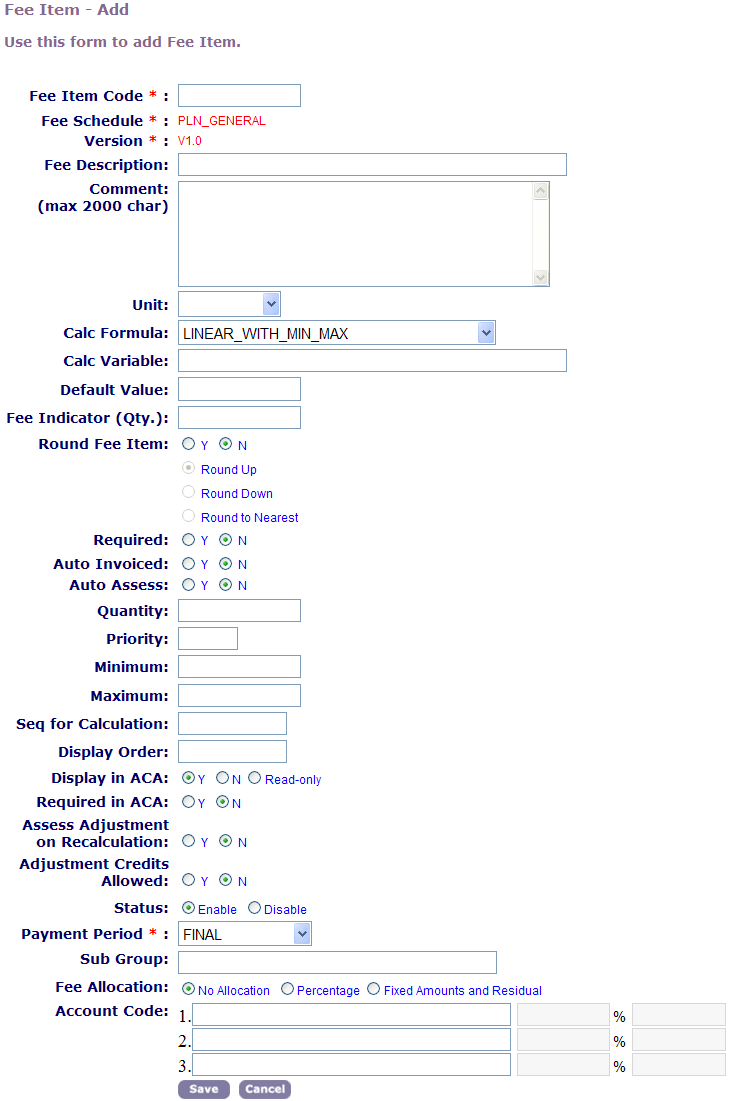
- Complete the Fee Item fields that apply to Point of Sale in Table 1. For more information see Understanding Fee Items.
- Click Save.
- To create more Fee Items for this Point of Sale fee schedule click Copy
and edit the Fee Item Code and Fee Description.
Table 1. Fee Item Fields Applicable to Point of Sale Fee Item Code Enter a unique code to identify the source or purpose of the Point of Sale fee item. For example, shirt, hat, map, or mug. Fee Schedule Enter the fee schedule that this fee item belongs to. Make certain that the fee schedule is exactly the same as the Standard Choice Value Description. For example, if you are adding a fee schedule for the Building module the fee schedule is POS_BLD_SCH. Version Choose the fee schedule version. A fee schedule can have different versions based on the start fee and end fee date. Fee Description Enter a brief description of the fee item to identify its source or purpose. For example, if the fee item you created was a map the fee description might be a map of city streets. Comment Enter a detailed description of the fee item to explain the fees purpose, logic, and any additional information associated to the fee. Unit Choose a fee unit from the drop-down list. For example, if you assess the fee on area, select the unit representative of square footage. Calc Formula Choose CONSTANT from the drop-down list for all Point of Sale items. For all point of sale fee items, choose CONSTANT from the drop-down list. The CONSTANT fee formula enables you to establish a set fee independent of ranges or valuations. For example, if you want to establish a flat rate for a city map, you can use the CONSTANT fee formula to establish a $10 fee.
Any fee calculated using this formula is the product of the constant and the quantity that a user enters while assessing fees. In this example, if you specify that a constant for an electrical application is $10 and a user enters 2 as the quantity, then the total fee for two electrical applications is $20.00.For more information the CONSTANT formula, see Fee Formulas.
Calc Variable For point of sale, the Calc Variable only supports numbers. For example, you might enter: 10. Default Value If you want the fee item to have a default quantity value, choose Y and enter the default quantity in the field. If you do not want a default quantity, choose N. Round Fee Item If you want the calculated fee item to round to the nearest dollar amount, choose Y, and then choose either Round Up, Round Down, or Round to Nearest dollar. If you want the fee to display the exact value, choose N. For example, your agency charges an Inspection Penalty Fee if a property is not ready for an inspection when the inspector arrives.
You can use a percentage formula to penalize 10% of the original inspection fee. This 10% value as calculated by the formula could be $4.56. To ensure the Inspection Penalty Fee is always a round number, select this option to round up the fee.Status If you want to make the fee item available to users in Civic Platform, select Enable; otherwise, select Disable. Payment Period You must choose Final for the payment period, because point of sale items are not dependent on an application review process. Subgroup Enter the code for the subgroup to which this fee item belongs. A fee item can belong to multiple subgroups. If you want this fee to belong to more than one subgroup, separate each group with a delimiter, such as a comma. Account Code If your agency wants to apportion this fee item to one of your agency accounts, you can enter up to three codes for the account here. These codes do not affect Civic Platform, but you can use them for your agency’s budget purposes.